An Overview of the Electric Propulsion Conversion
Over the past few years I've completed a fairly extensive overhaul of my Gemini 105M. Because other boat owners have expressed interest in an overview of the electronic conversion process, I created the summary below.
First, I should note that the skilled assistance of Chris Forrest, the ever-knowledgeable owner of Santa Cruz Marine, made this complicated project possible. In all my years I've never encountered a finer sailor/contractor/craftsman.
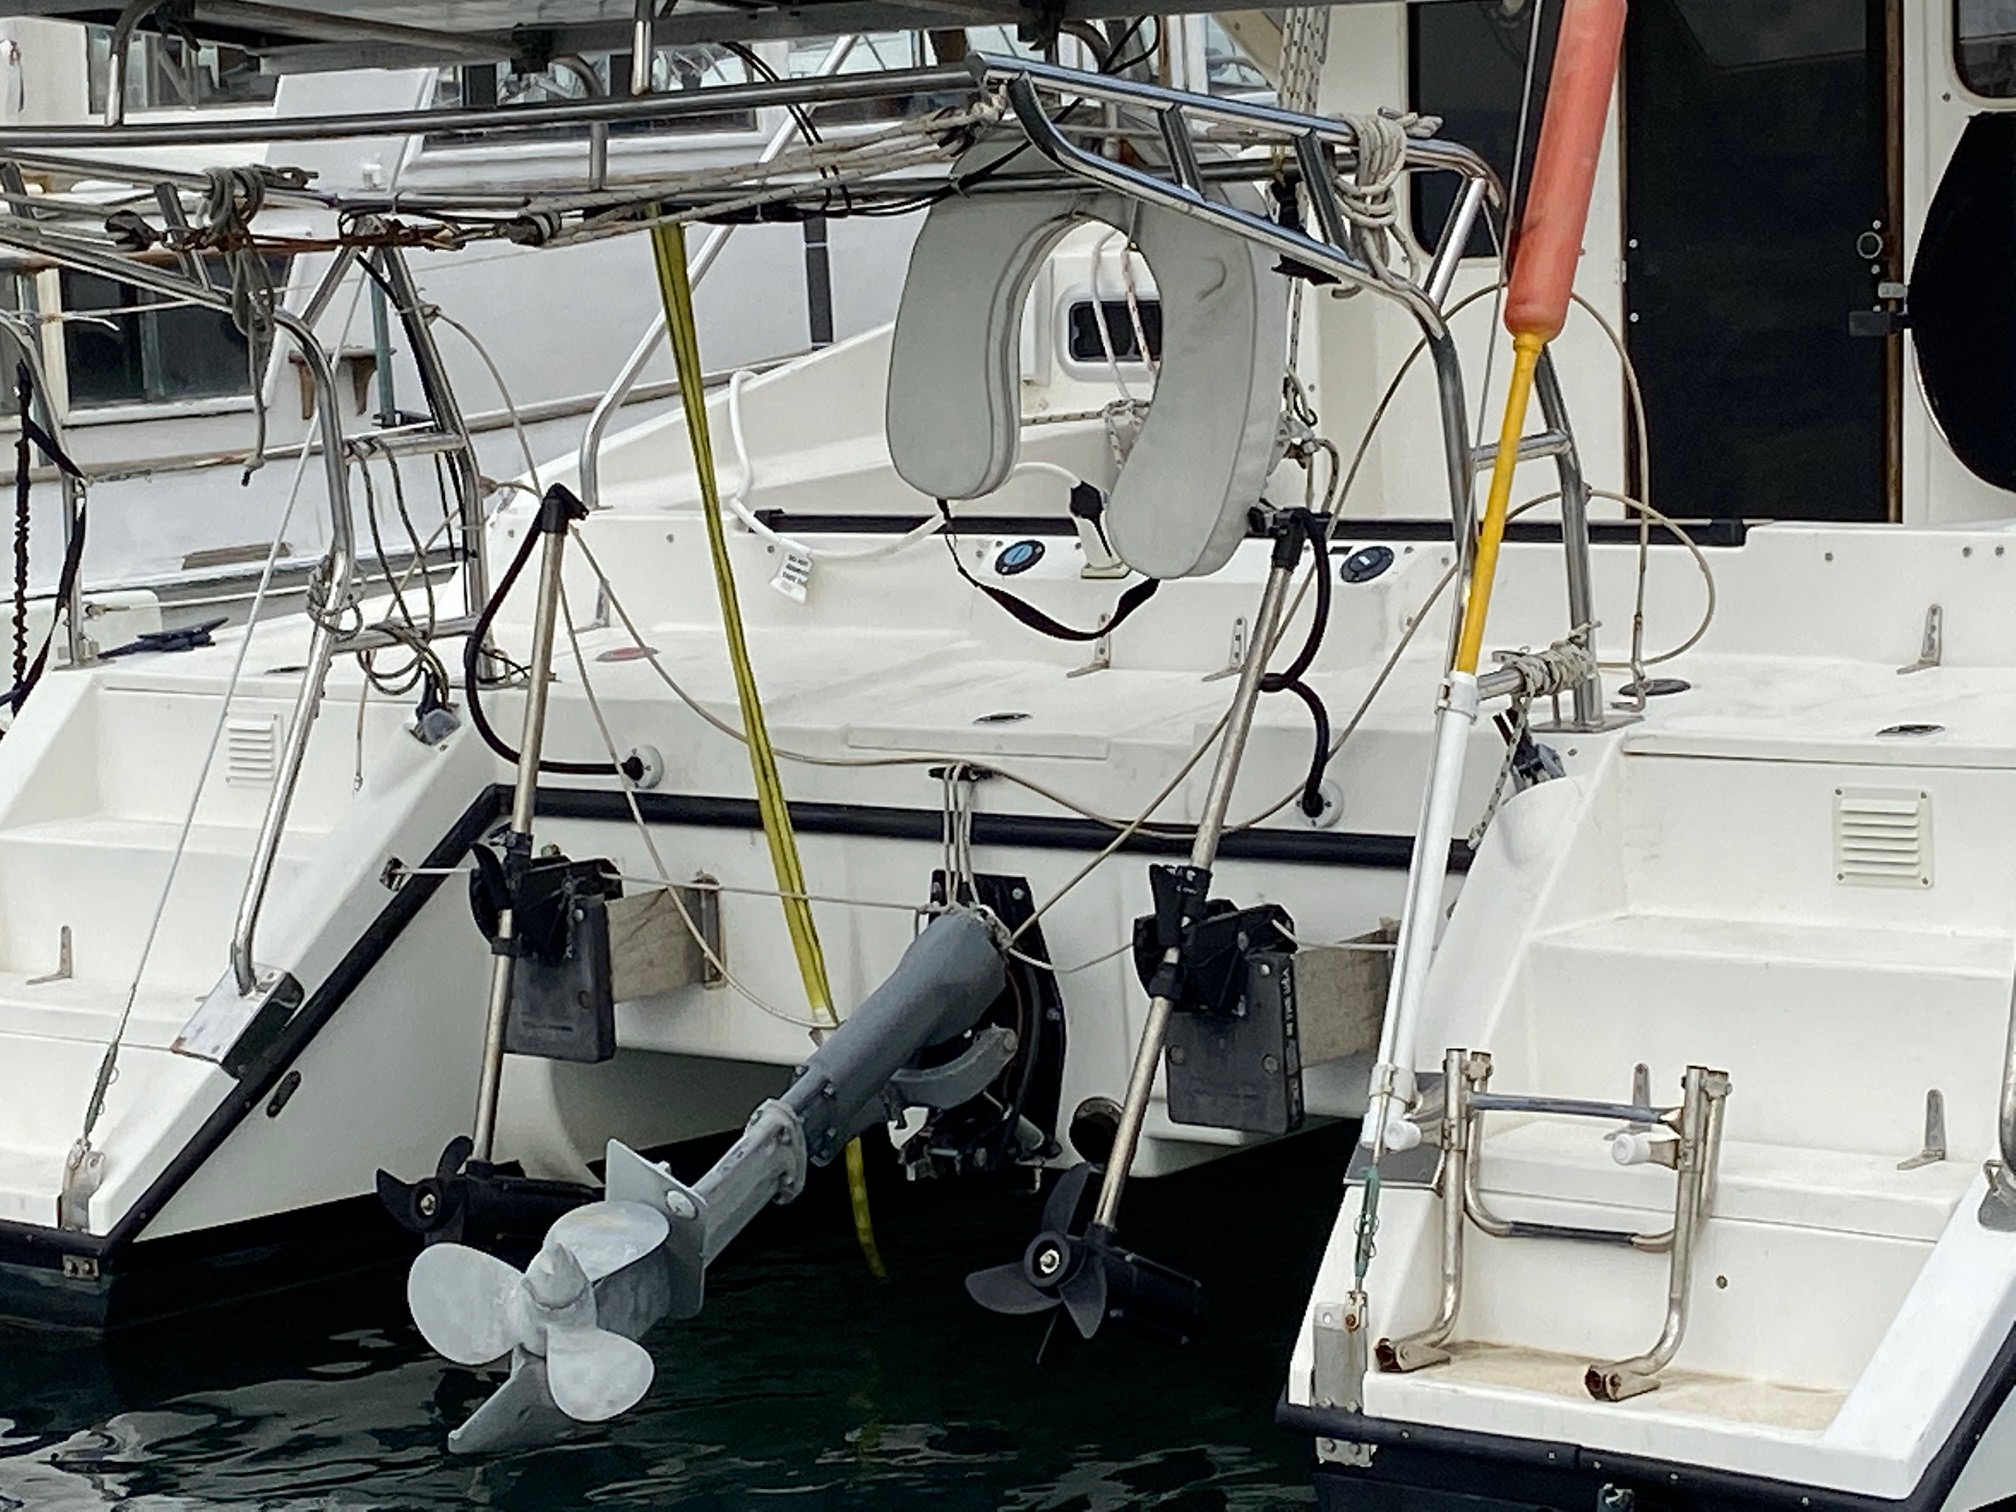
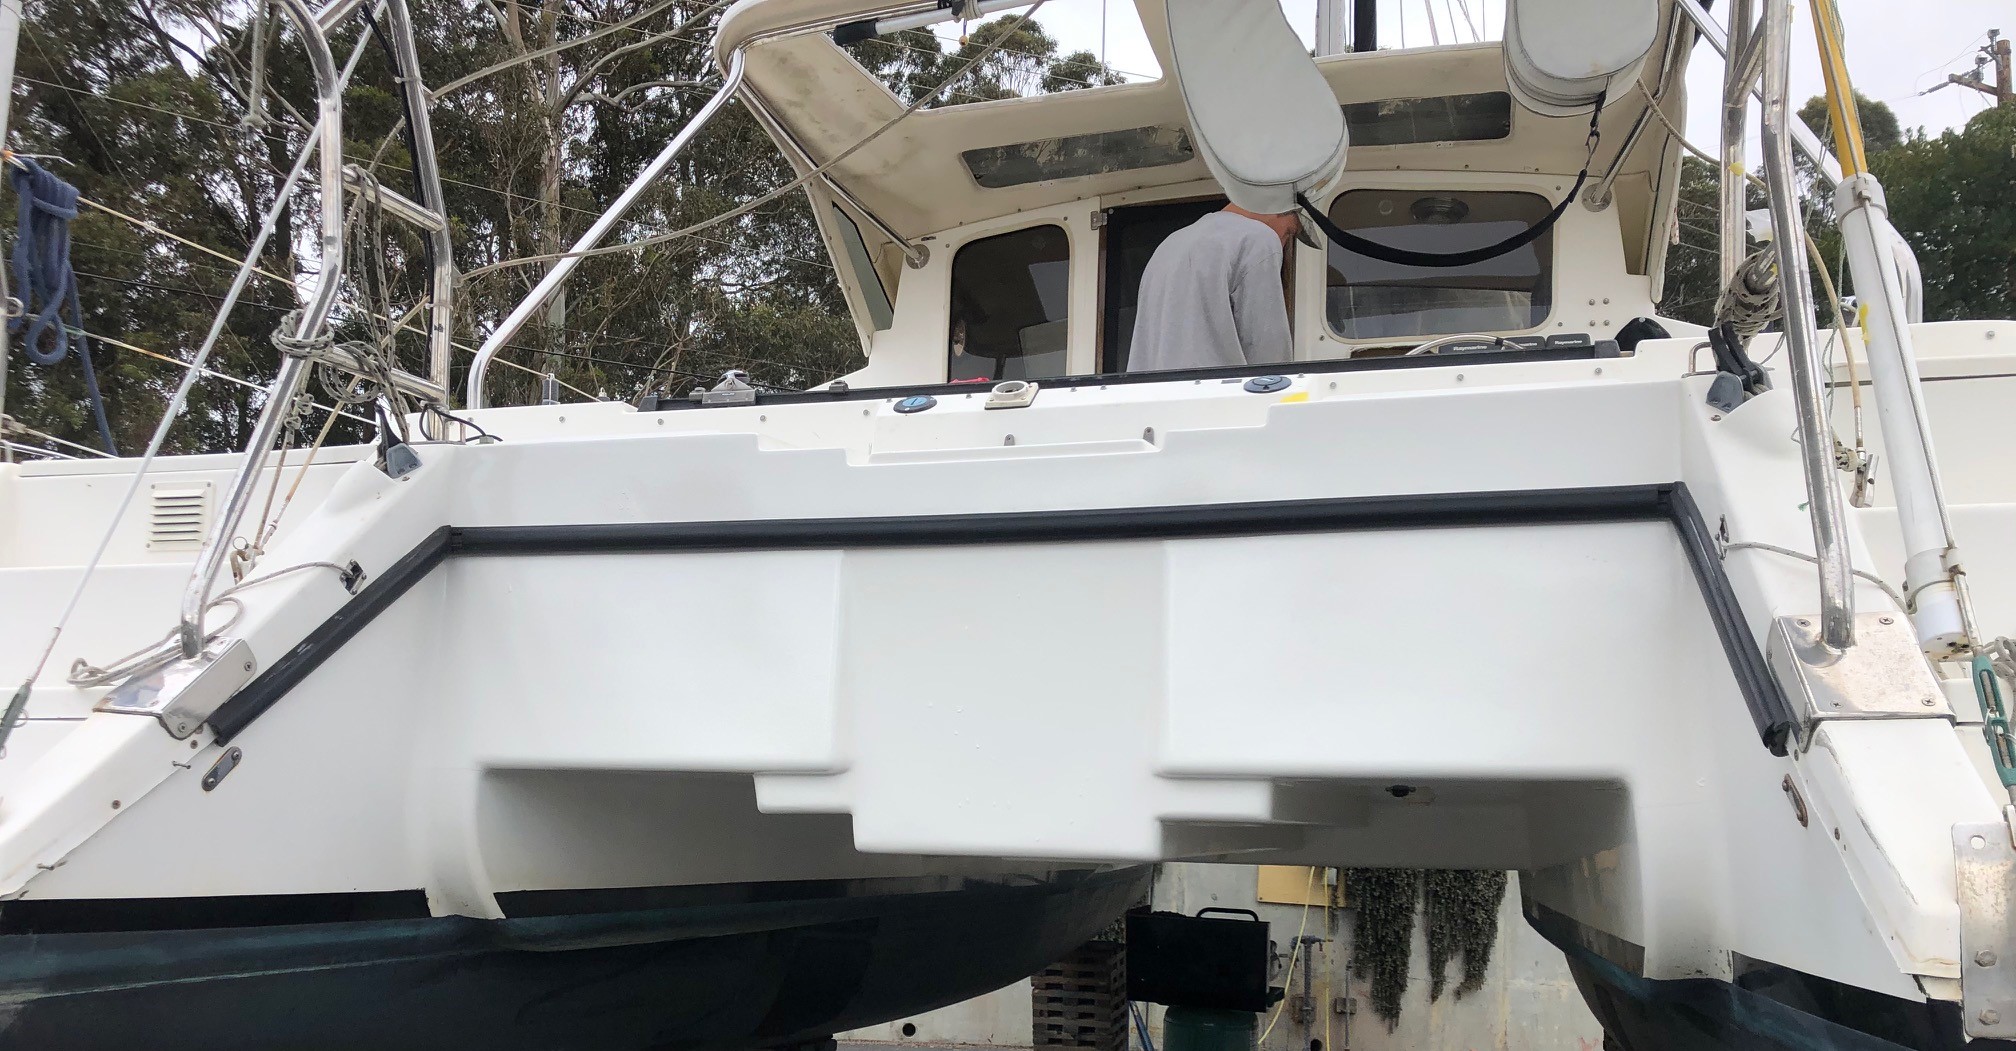
This is the stern of the Gemini in its stock configuration. Note the retractable diesel drive-leg. I never had much luck with the drive-leg. Despite considerable tinkering, the locking mechanism would often fail and the leg would kick up in reverse -- not ideal when docking -- or the leg wouldn't come out of the locked position when I wanted to lift the leg. Other Gemini owners have found ingenious ways around this issue, but I decided I'd had enough. Note the rather spindly looking electric trolling motors the previous owner mounted on the stern. Though not terribly impressive and connected to very heavy lead acid batteries, they piqued my interest in electric propulsion.
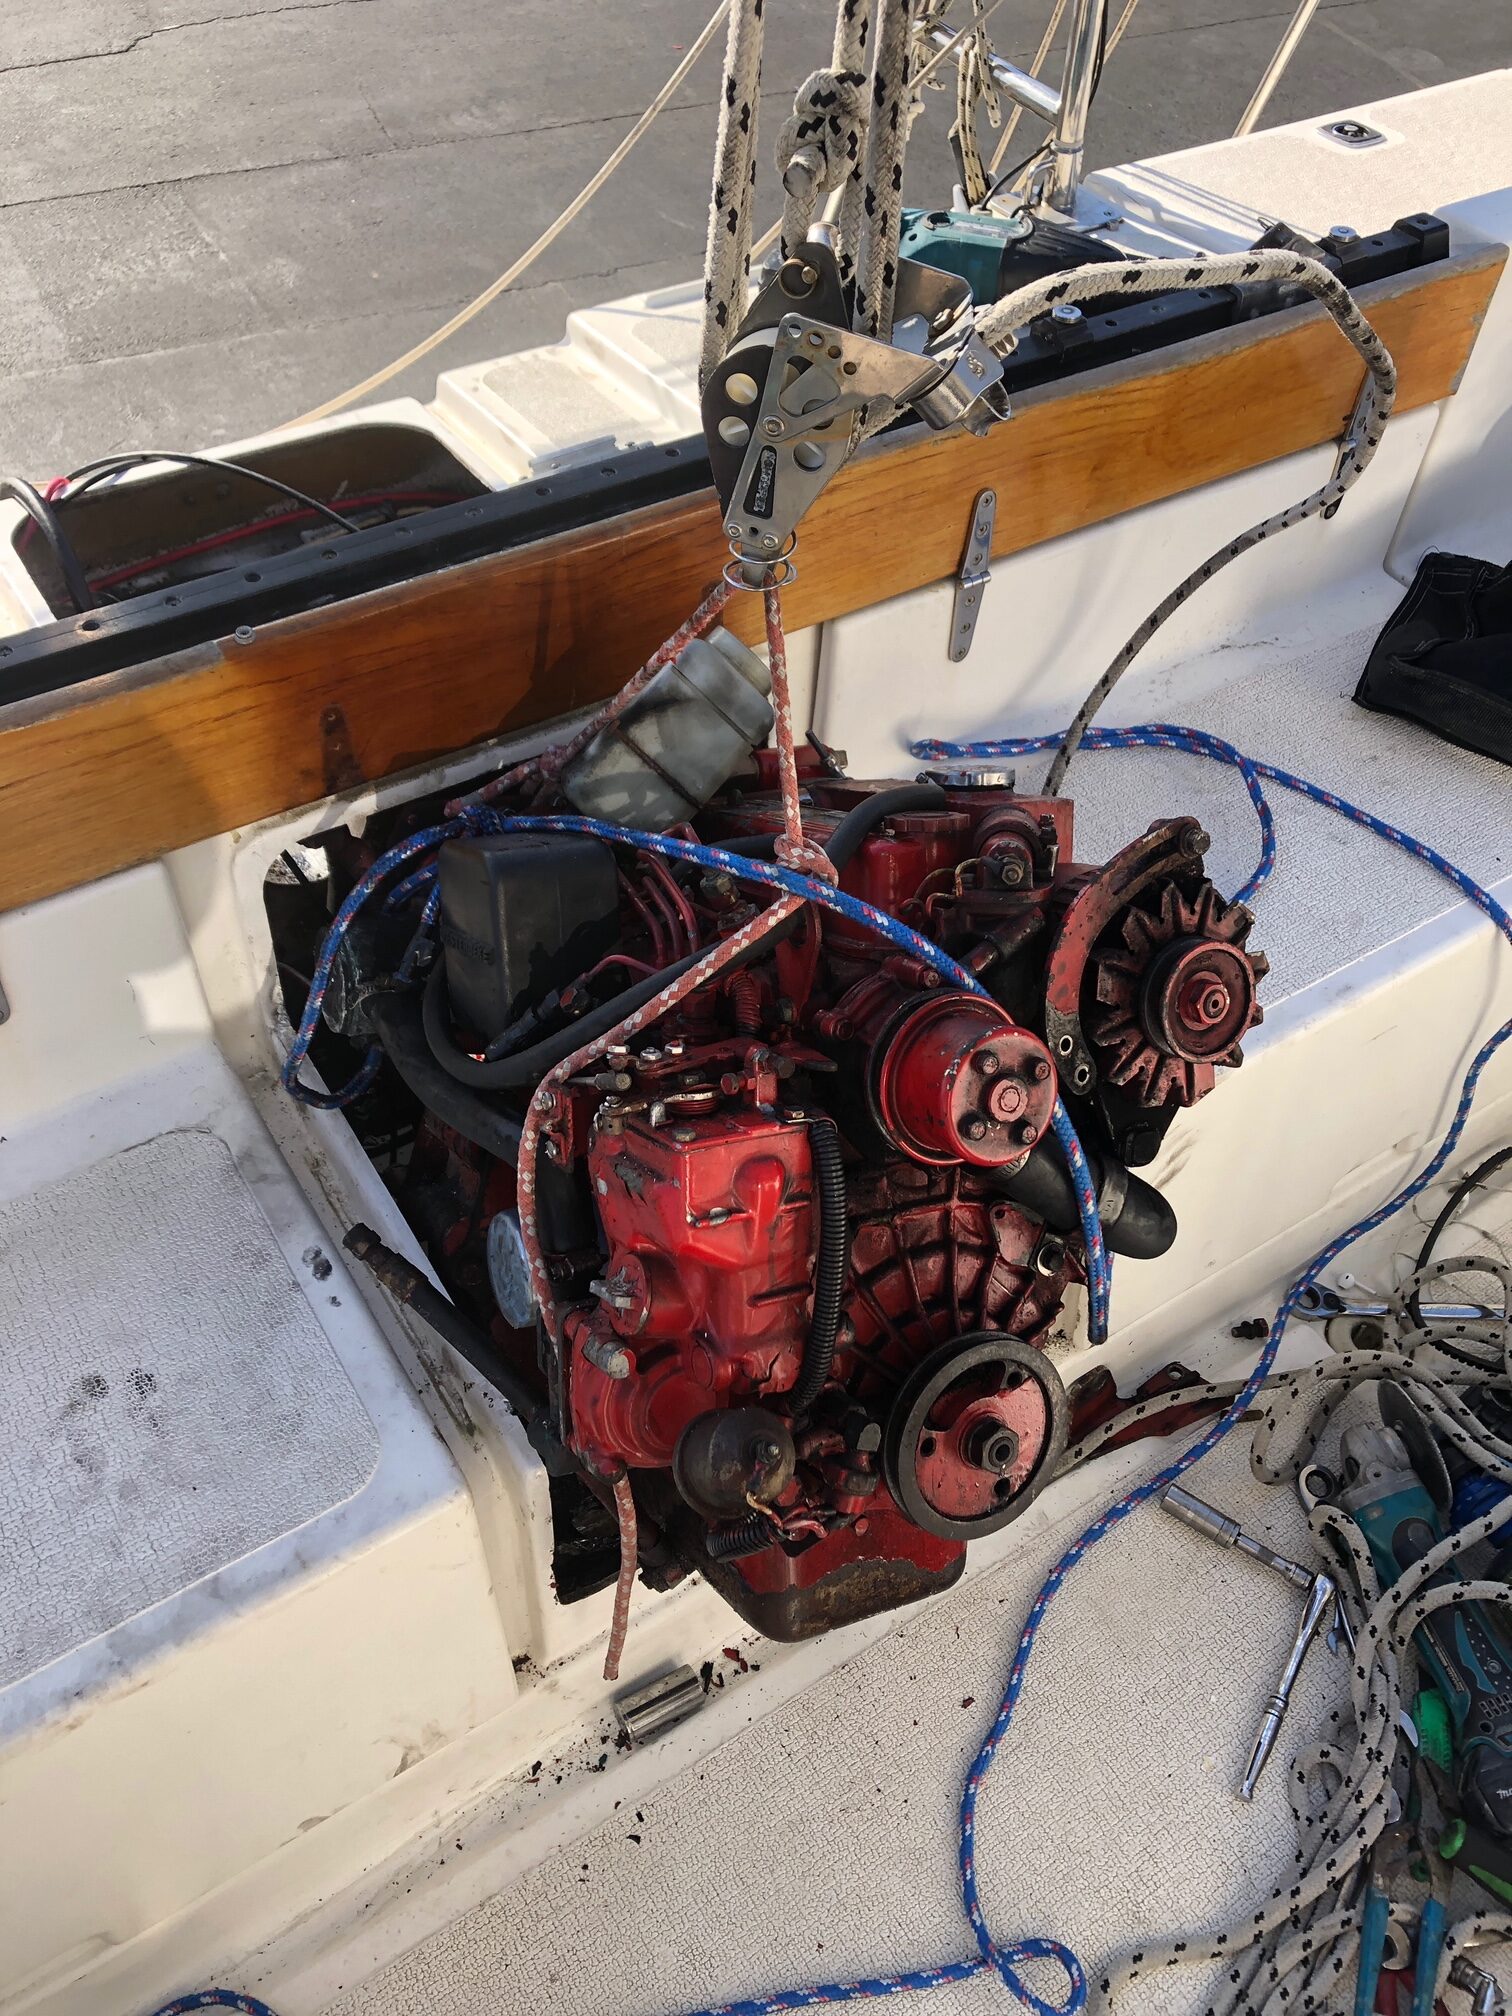
When my Westerbeke diesel inboard gave up the ghost, I considered pursuing a gas outboard conversion. This more conventional approach likely would have been a very effective (and reasonably priced) solution. That said, the allure of the silence, cleanliness, low maintenance and fine control that comes with electric propulsion was too enticing to ignore.
Those little trolling motors in the previous photo were enough to get the boat offshore and set us up for a nice sail to Santa Cruz. After a fun trip, the project began in earnest.
First, all of those dirty diesel propulsion components (including the inboard engine itself) had to come out. Not surprisingly, it was a tight fit.
After the drive-leg and trolling motors were removed, a little repair work to the hull was needed. The beautiful fiberglass work is courtesy of Chris Forrest and his hardworking crew in Santa Cruz.
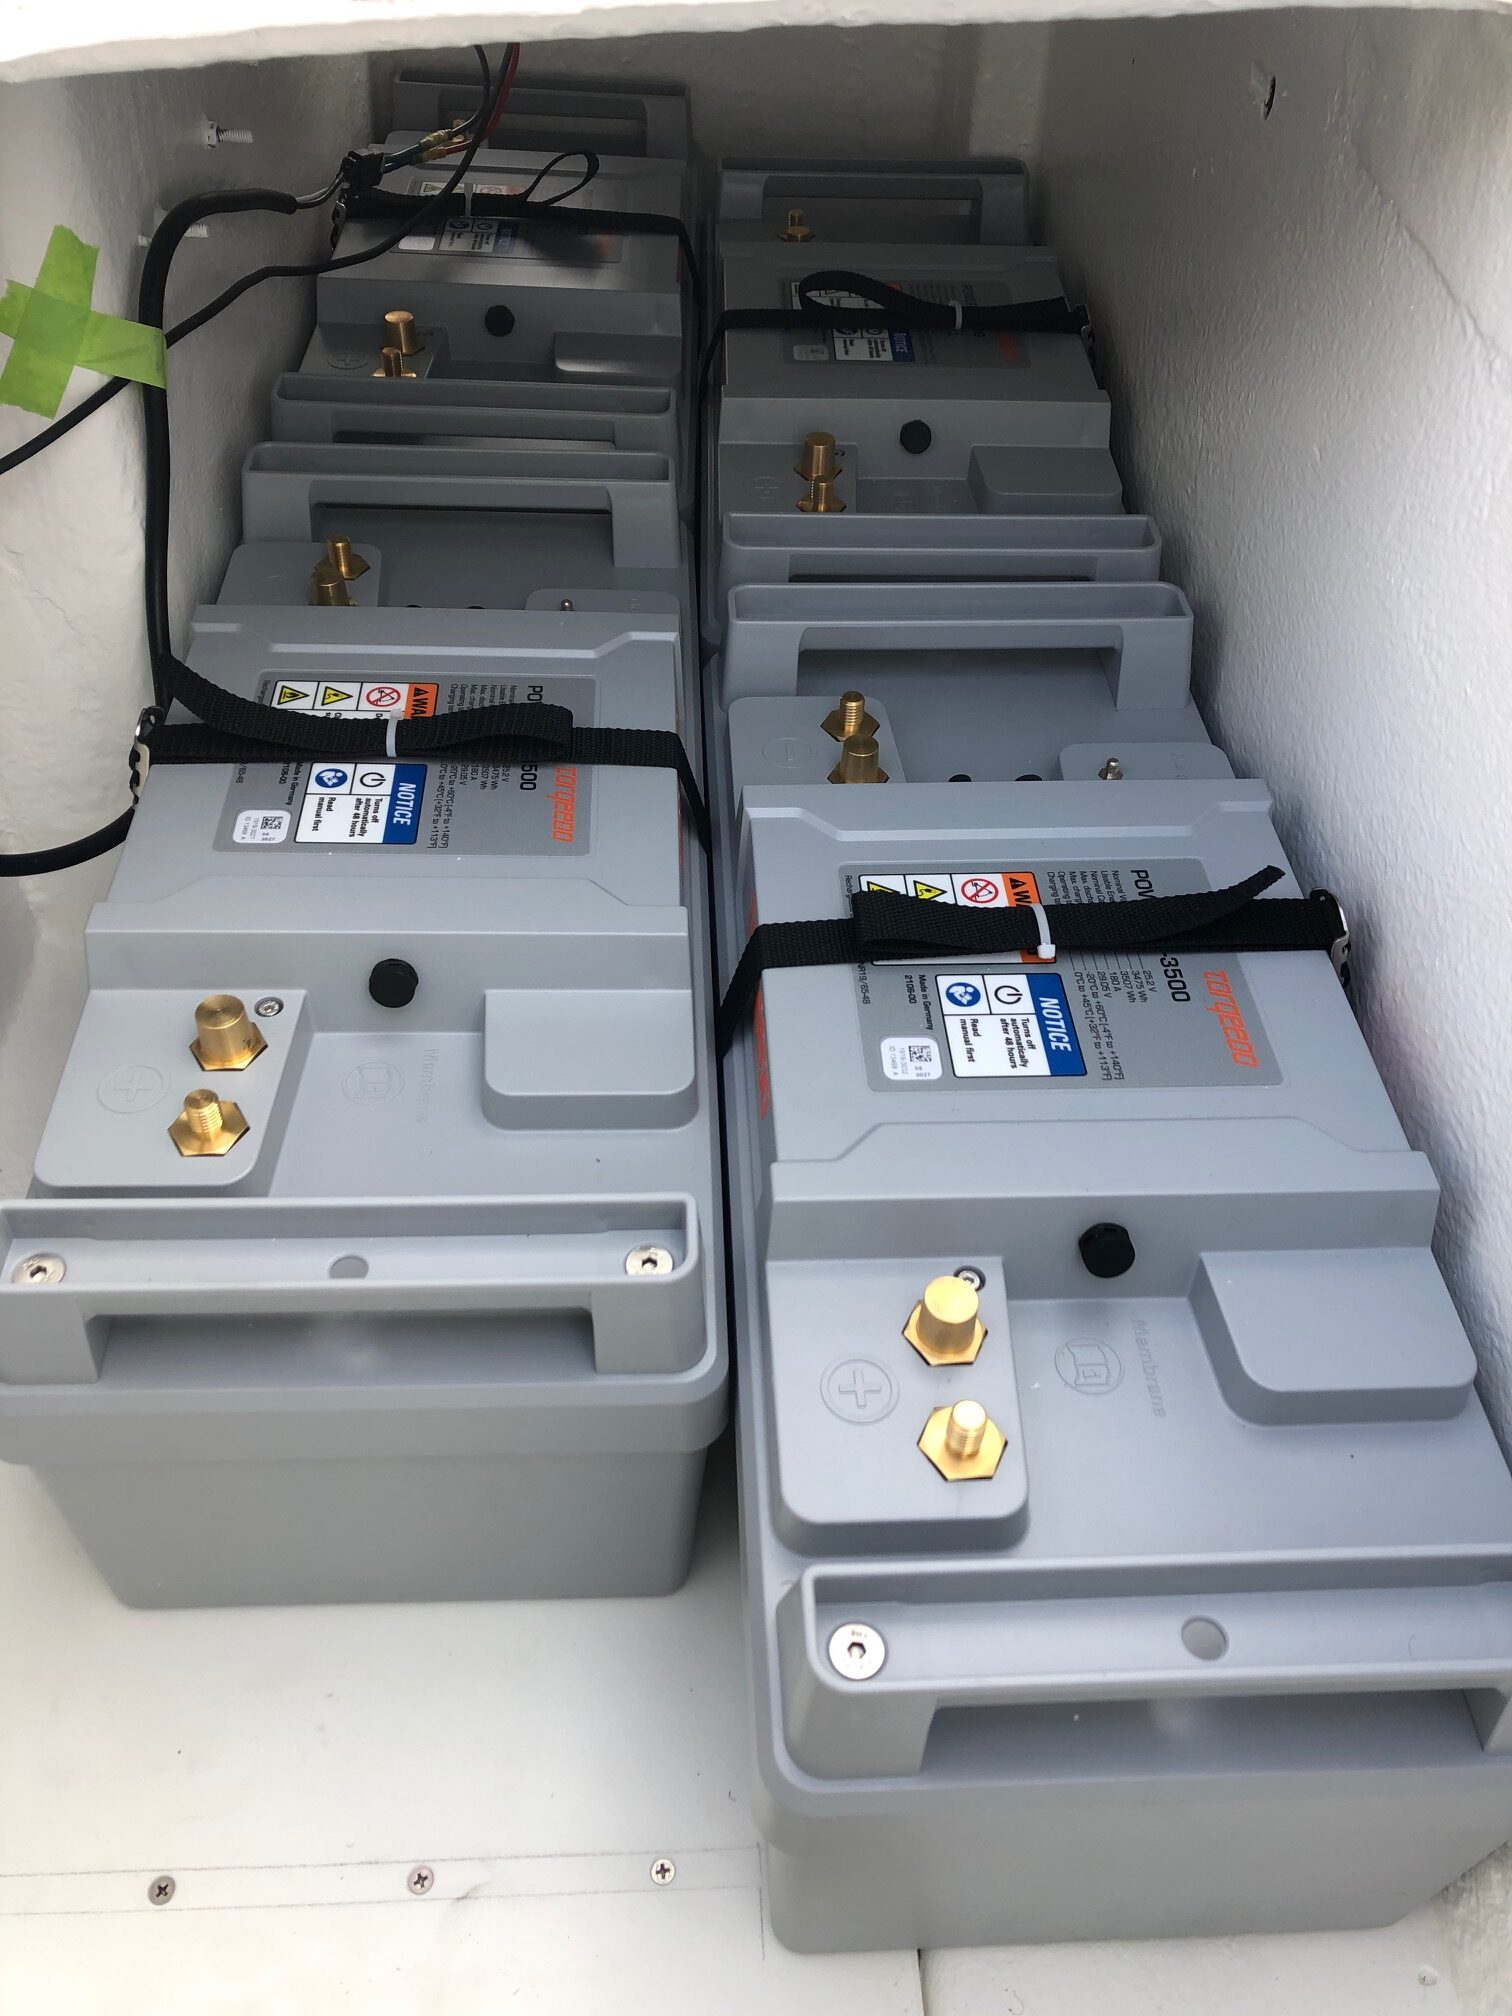
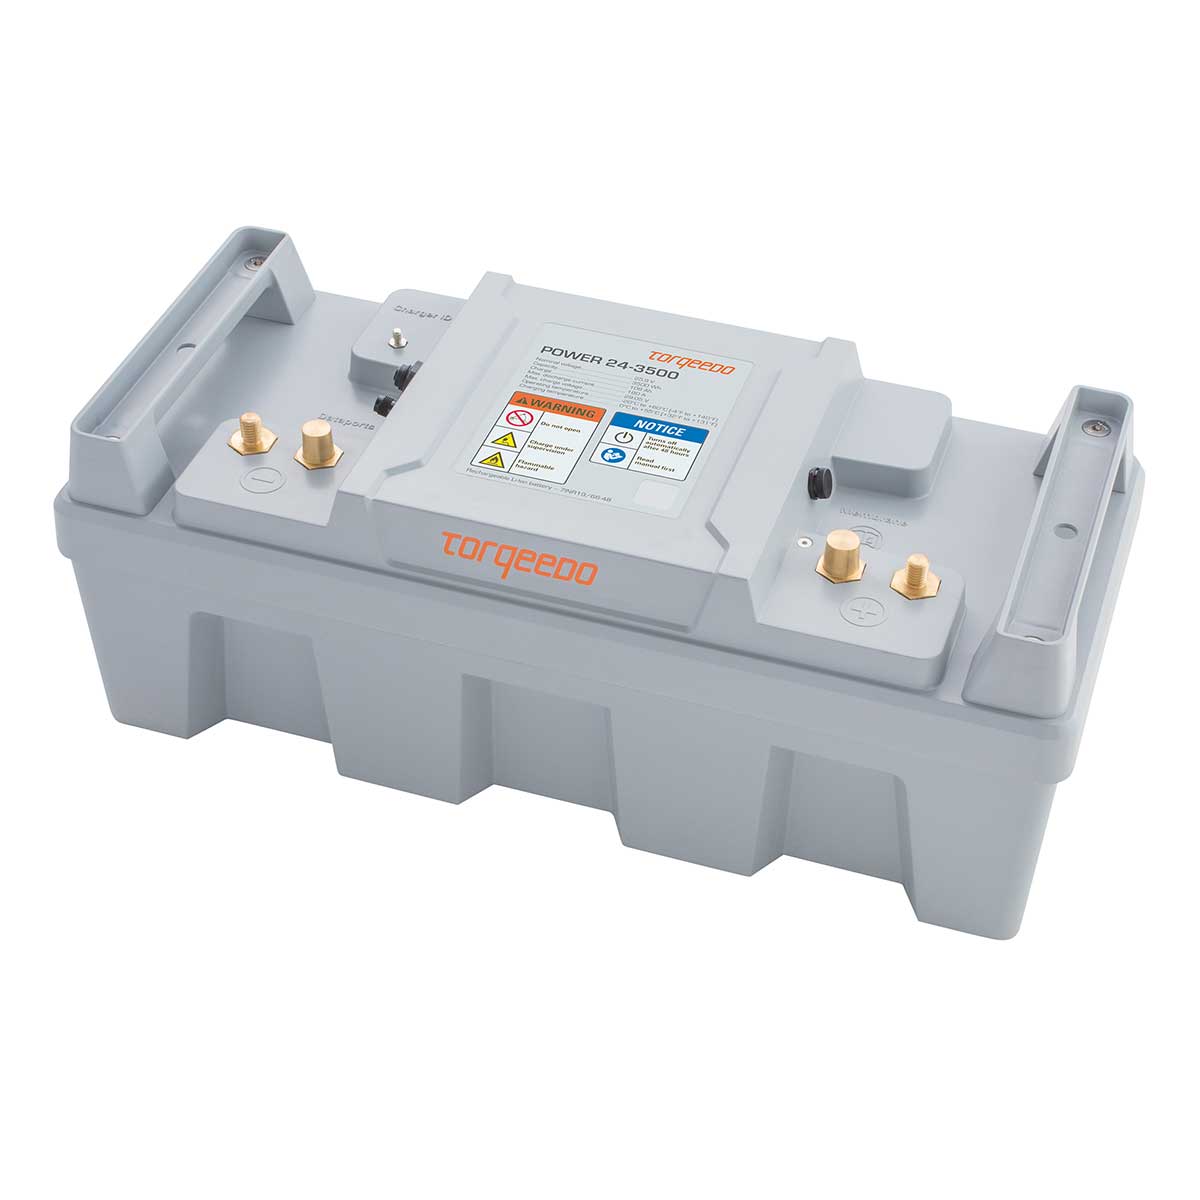
The batteries are a near perfect fit for the space in the stern which previously contain the diesel fuel tanks. The four lithium ion batteries (photographed pre-wiring) in each bank have a combined capacity of 14,000 Watt-hours (Wh). The port and starboard compartments are mirror images of each other, for a total of 28,000 Wh. The compartments required only minor modification to satisfactorily hold the batteries securely.
I'll get into a more detailed analysis of batteries later, but I did spend countless hours comparing lithium batteries. The convenient dimensions, energy-density, cost, multiple safety features, and marinized design of Torqeedos 24-3500s made them a clear winner after all of my analysis.
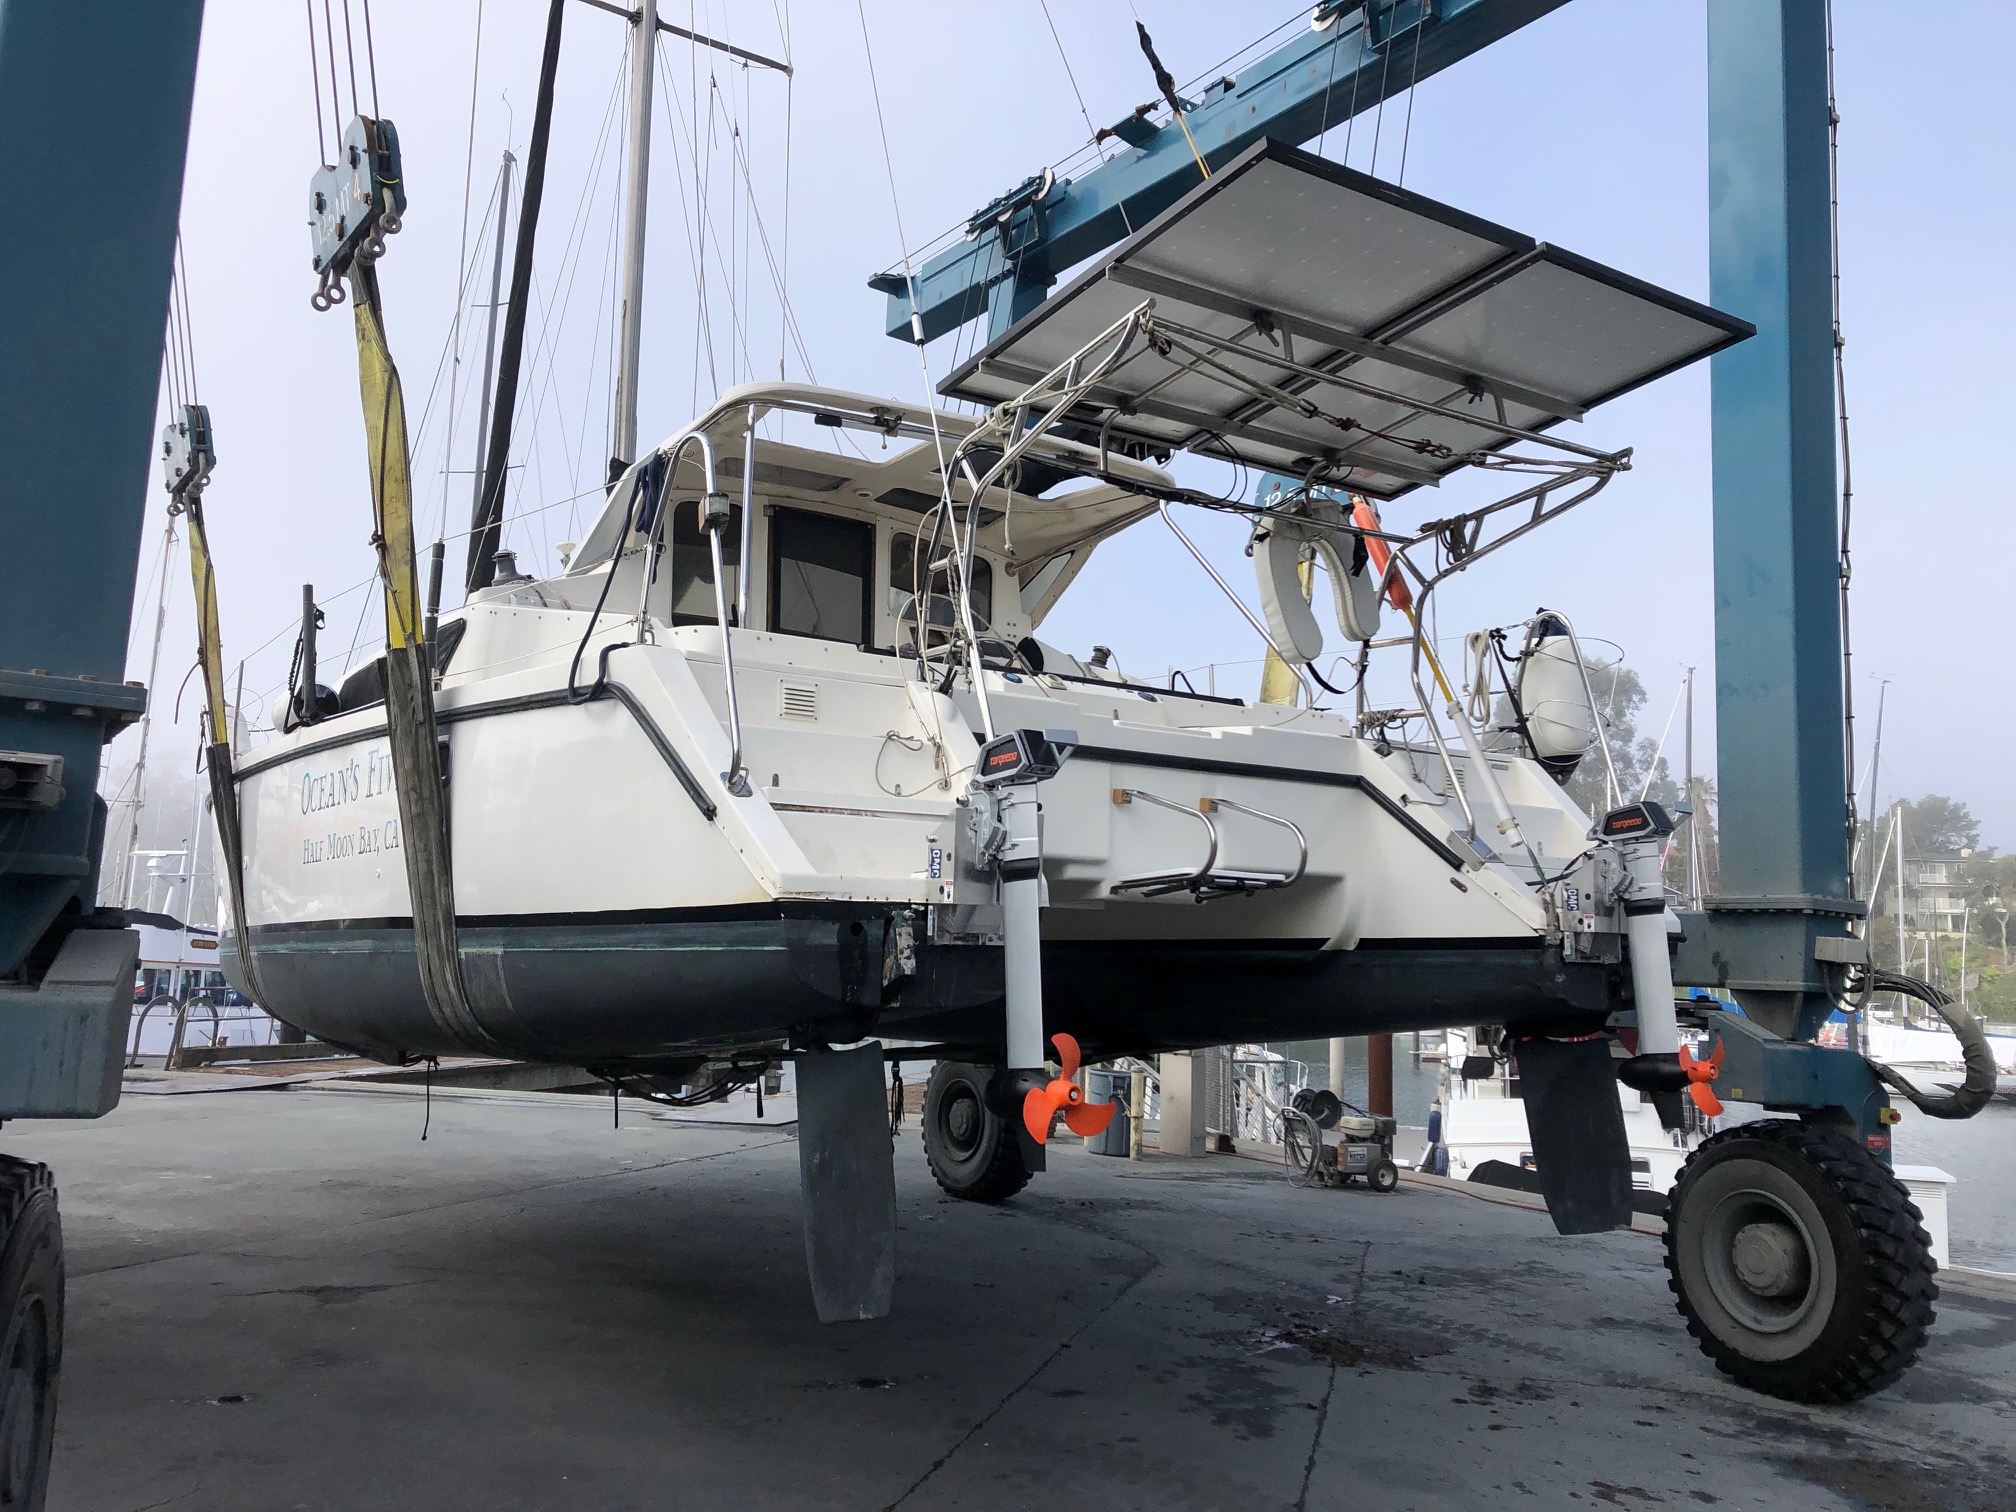
This photo shows the location of the new electric outboards. I wanted to keep the steps on each ama as usable as possible, so I mounted the motors and hydraulic tilts as far inboard as I could on each ama. I toyed around with the idea of mounting the outboards on the transom (much like the original drive-leg was situated), and I am very glad that I didn't. Fixed dual outboards eliminates the complexity of the steerable drive-leg concept while also providing nice maneuverability in port.
I decided to mount a little swim platform with a retractable ladder where the drive-leg used to be. This comes in handy not only for the obvious reason (getting out of the water and back onto the boat), but also for getting in and out of my dinghy.
Note the two existing Panasonic solar panels on the dinghy davits. Each panel is connected to a high-speed Torqeedo solar charger. Charging 28,000 Wh of batteries is no small task, and these panels and the chargers will do the job in about a week of moderate sun.
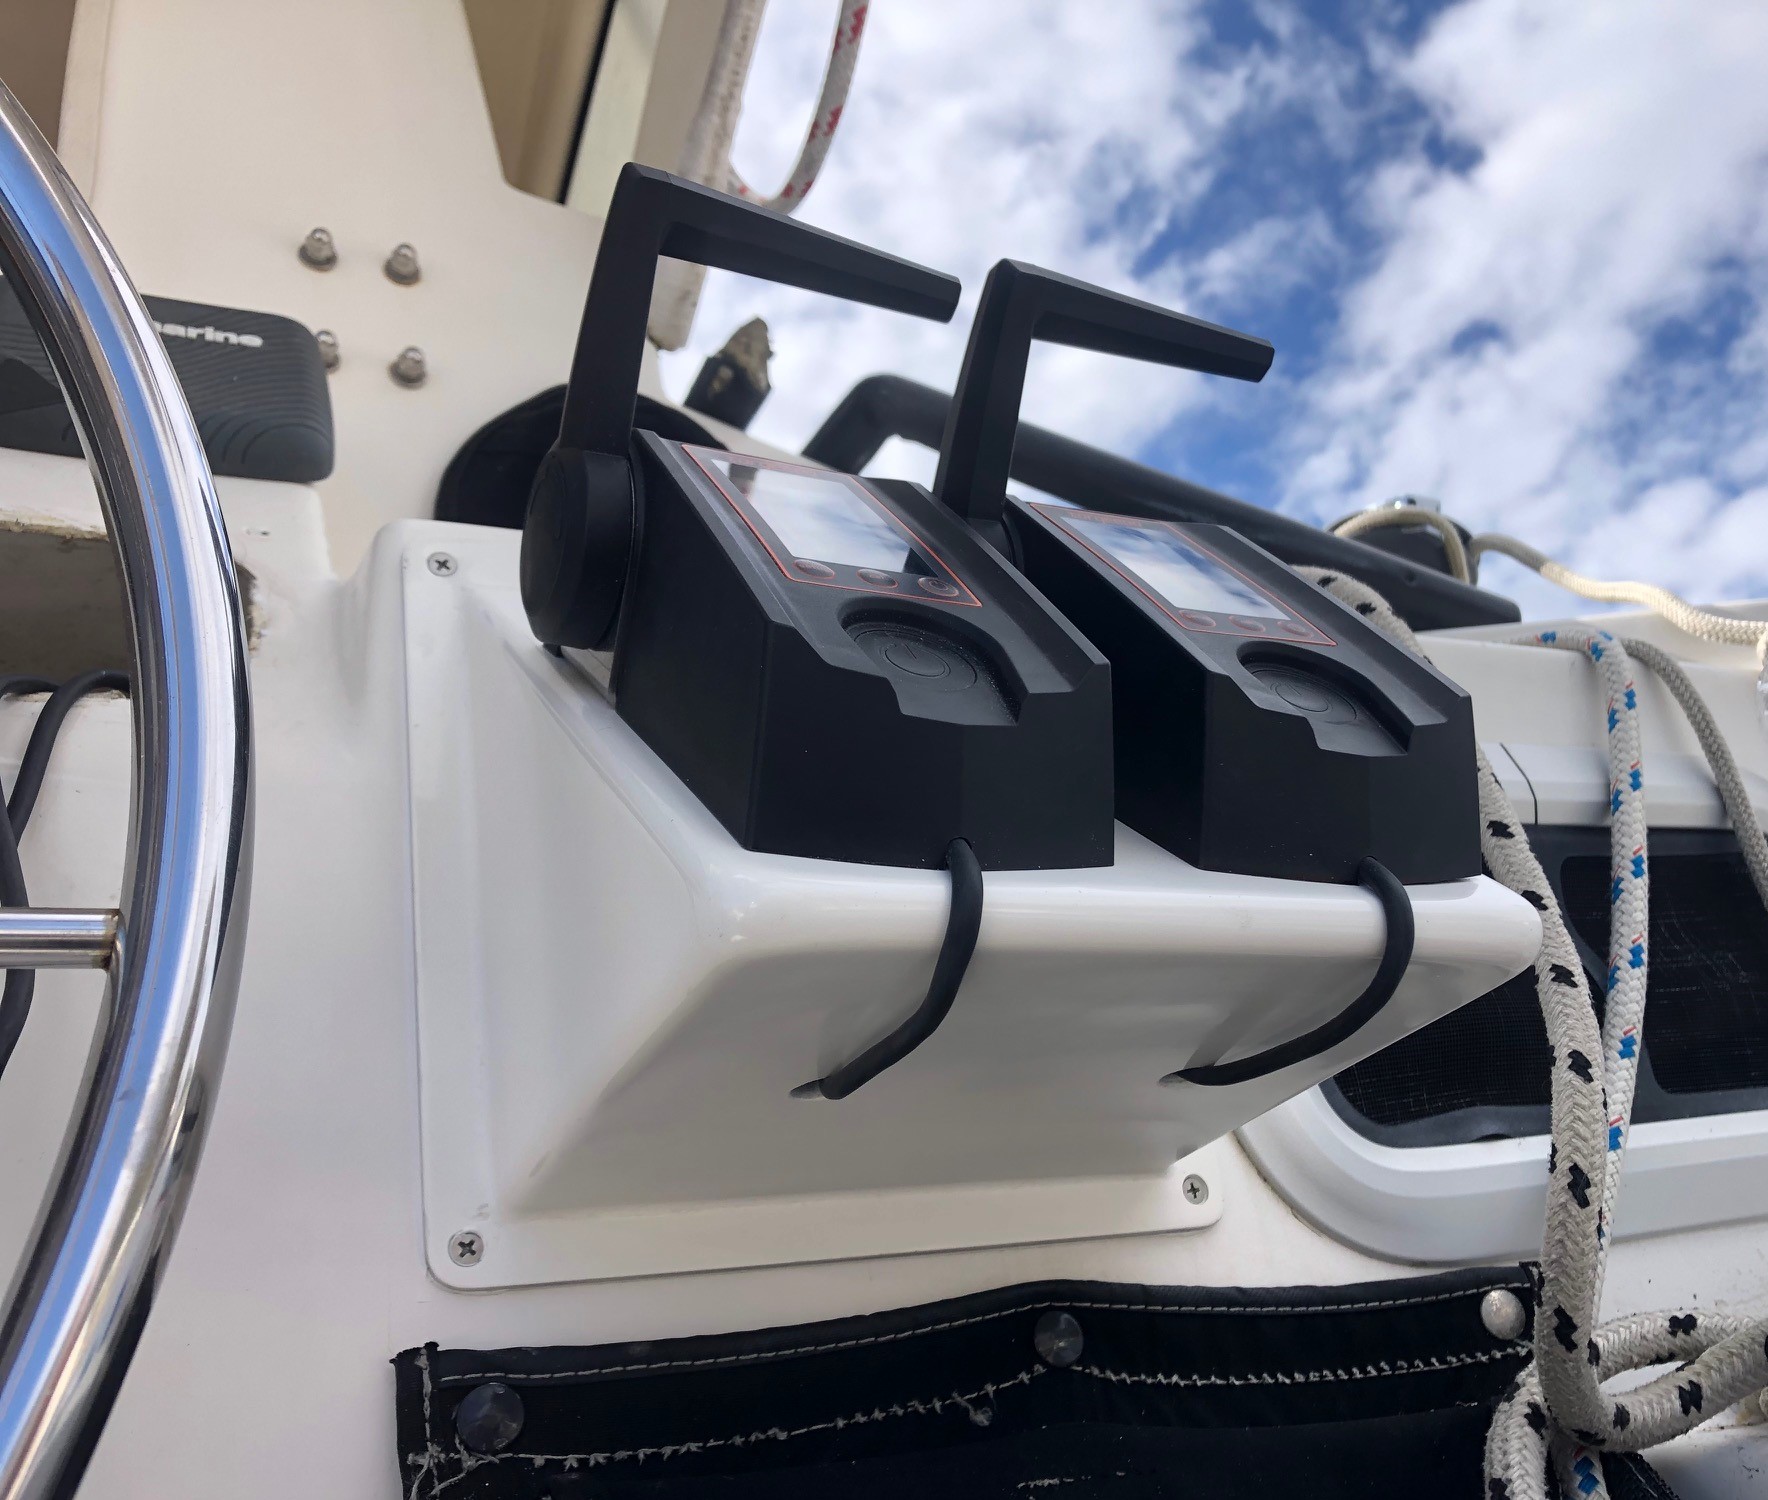
Chris created a custom mount for the Torqeedo controllers. The throttles work well, even if they don't feel particular substantial. The throttles themselves allow very fine adjustments to the power supplied to the outboards, which in turn allows for very refined changes to the speed of the boat. The displays on the throttle do a nice job of estimating the remaining range (in nm in my case) of the battery banks, along with reporting the speed of the boat and the power being utilized.
I should note that Torqeedo offers a very attractive (and much sturdier looking) dual-throttle as an additional purchase. I considered this, and while it would have been a nice addition, I actually like the fact that each of my twin outboards, twin battery banks, and all accompanying electronics (including the controllers) are completely independent. This feels like a nice safety feature in the event of the failure of one system.
They aren't attached in this photo, but the throttles have orange magnetic safety clips that can be tethered to the operator's wrists (a variation of the common small personal watercraft feature).
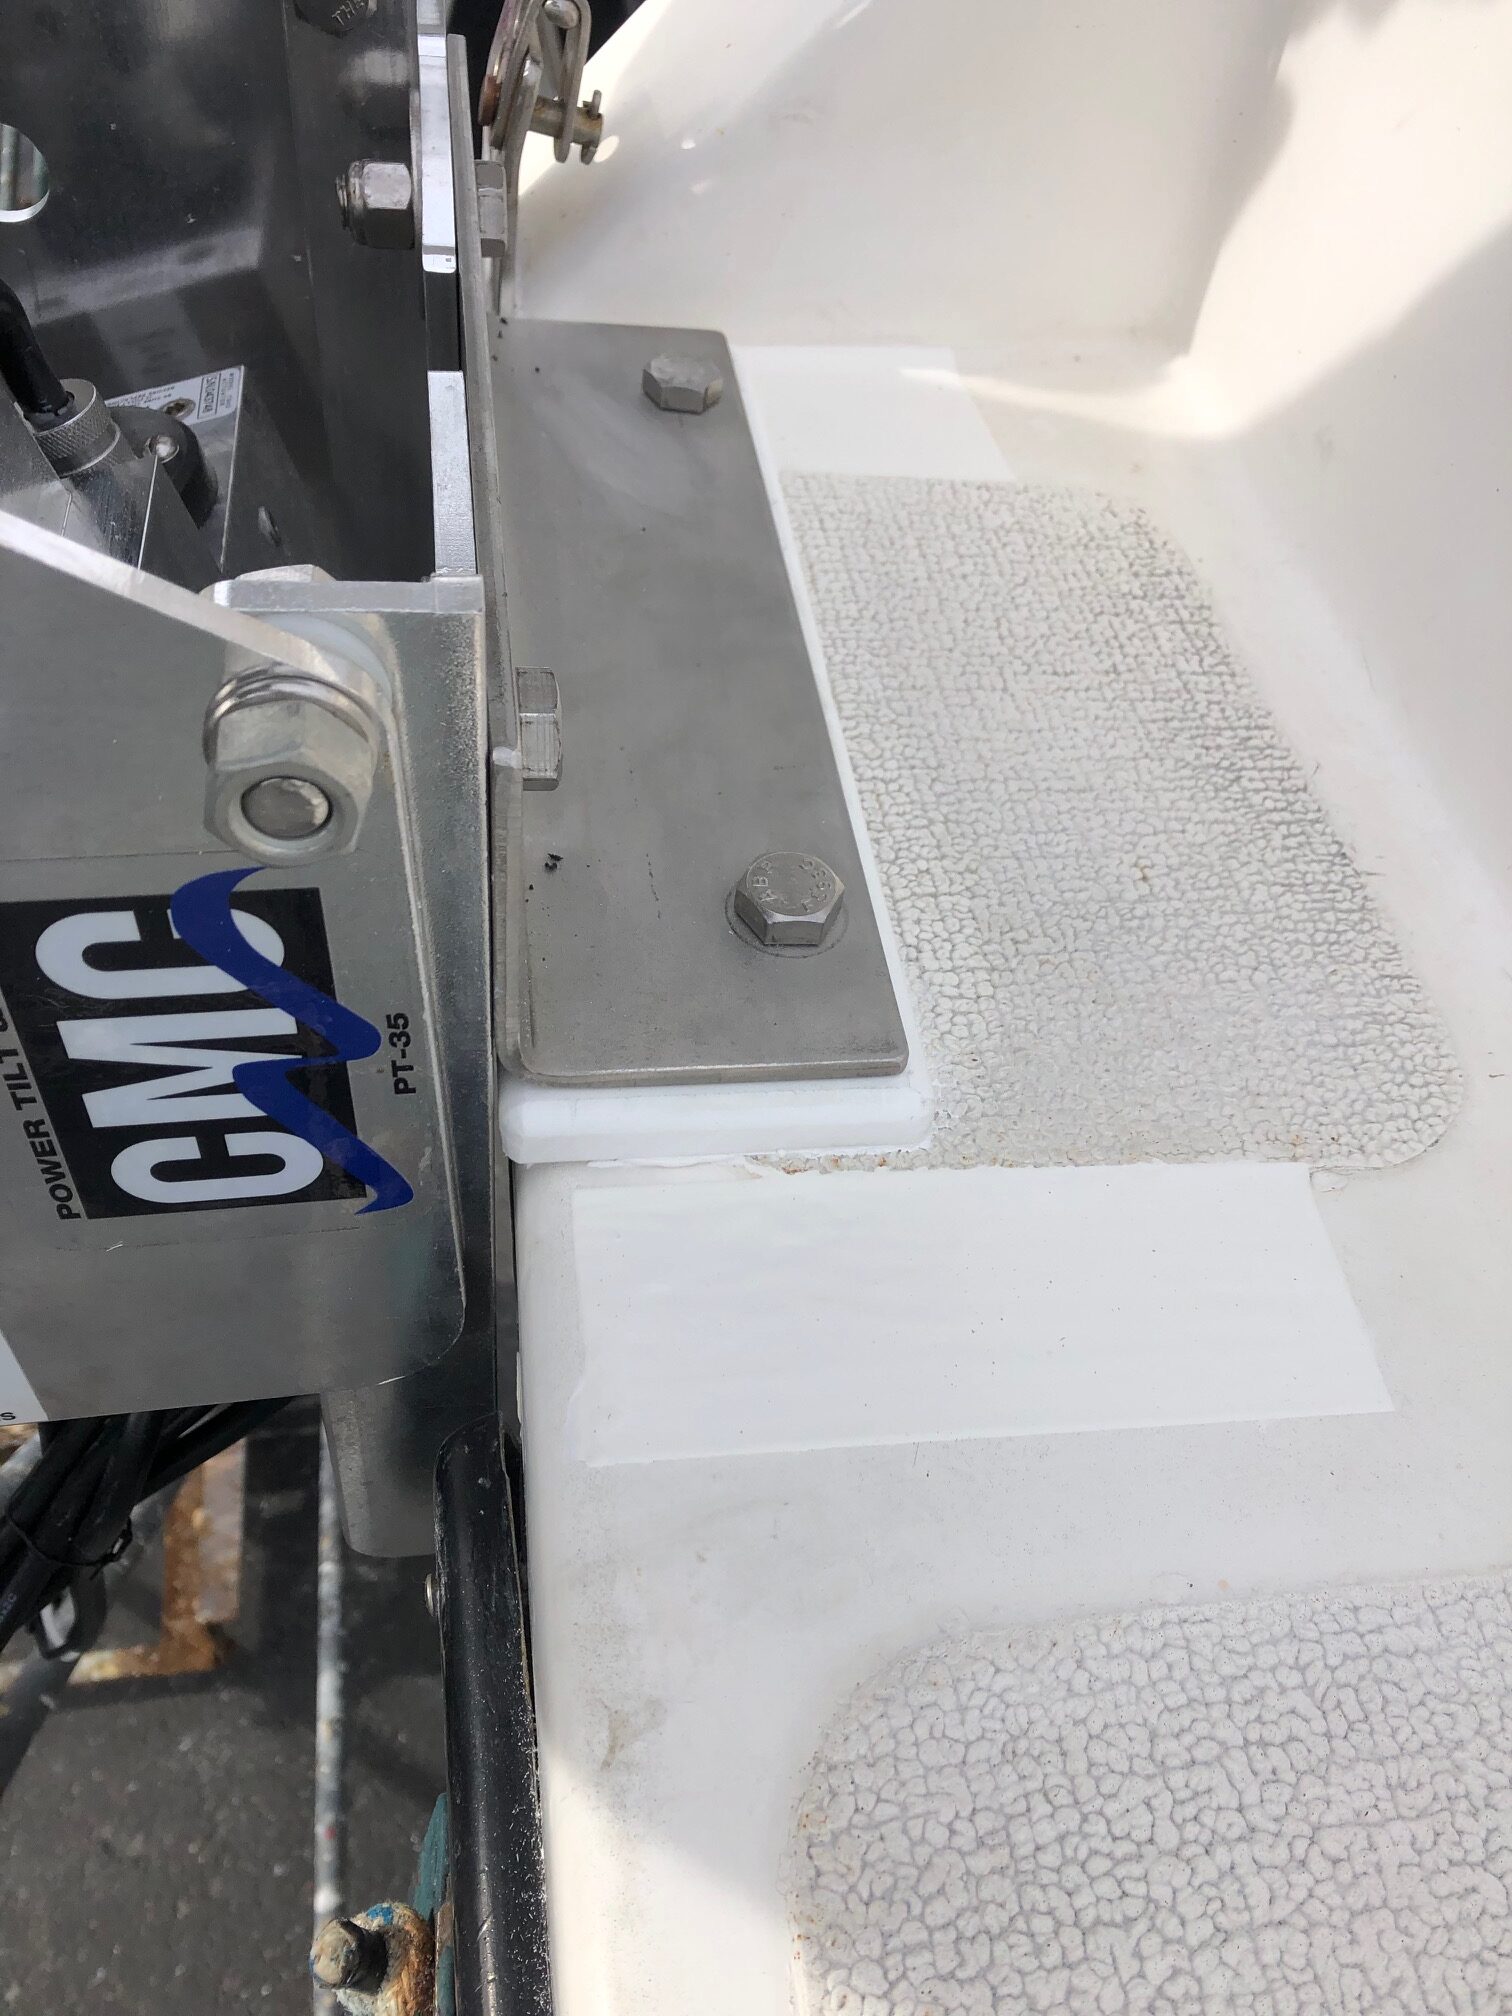
This isn't the best photo, but it does show how the hydraulic power tilts are bolted to brackets which are in turn are bolted to the amas. Calculating the right height for the outboards took a lot of thought. Now for a confession: My assumptions were off. I underestimated the weight savings that came with this project. The stern sits higher than I anticipated in the water, and if I could do it over, I would have mounted the outboards an inch lower. The current height works fine, but I suspect what little cavitation I currently experience would be reduced if the outboards were lowered.
Those CMC PT-35 power tilts? Mounting these 24-lb units on the amas was one of the best decisions I made when designing this system. Other power tilts were simply too heavy for what I needed, often well over 50lbs each. My Torqeedo 4.0 outboards only weigh 37 pounds each, and most of the power tilts I found were rated for 50hp-plus outboards and would have been a bit ridiculous. The PT-35, on the other hand, is pretty dreamy. Flipping a simple switch next to the instruments, rather than having to monkey around with a manual lift, is luxurious. Transitioning between sailing with the outboards up and motoring makes me smile every time -- too easy.
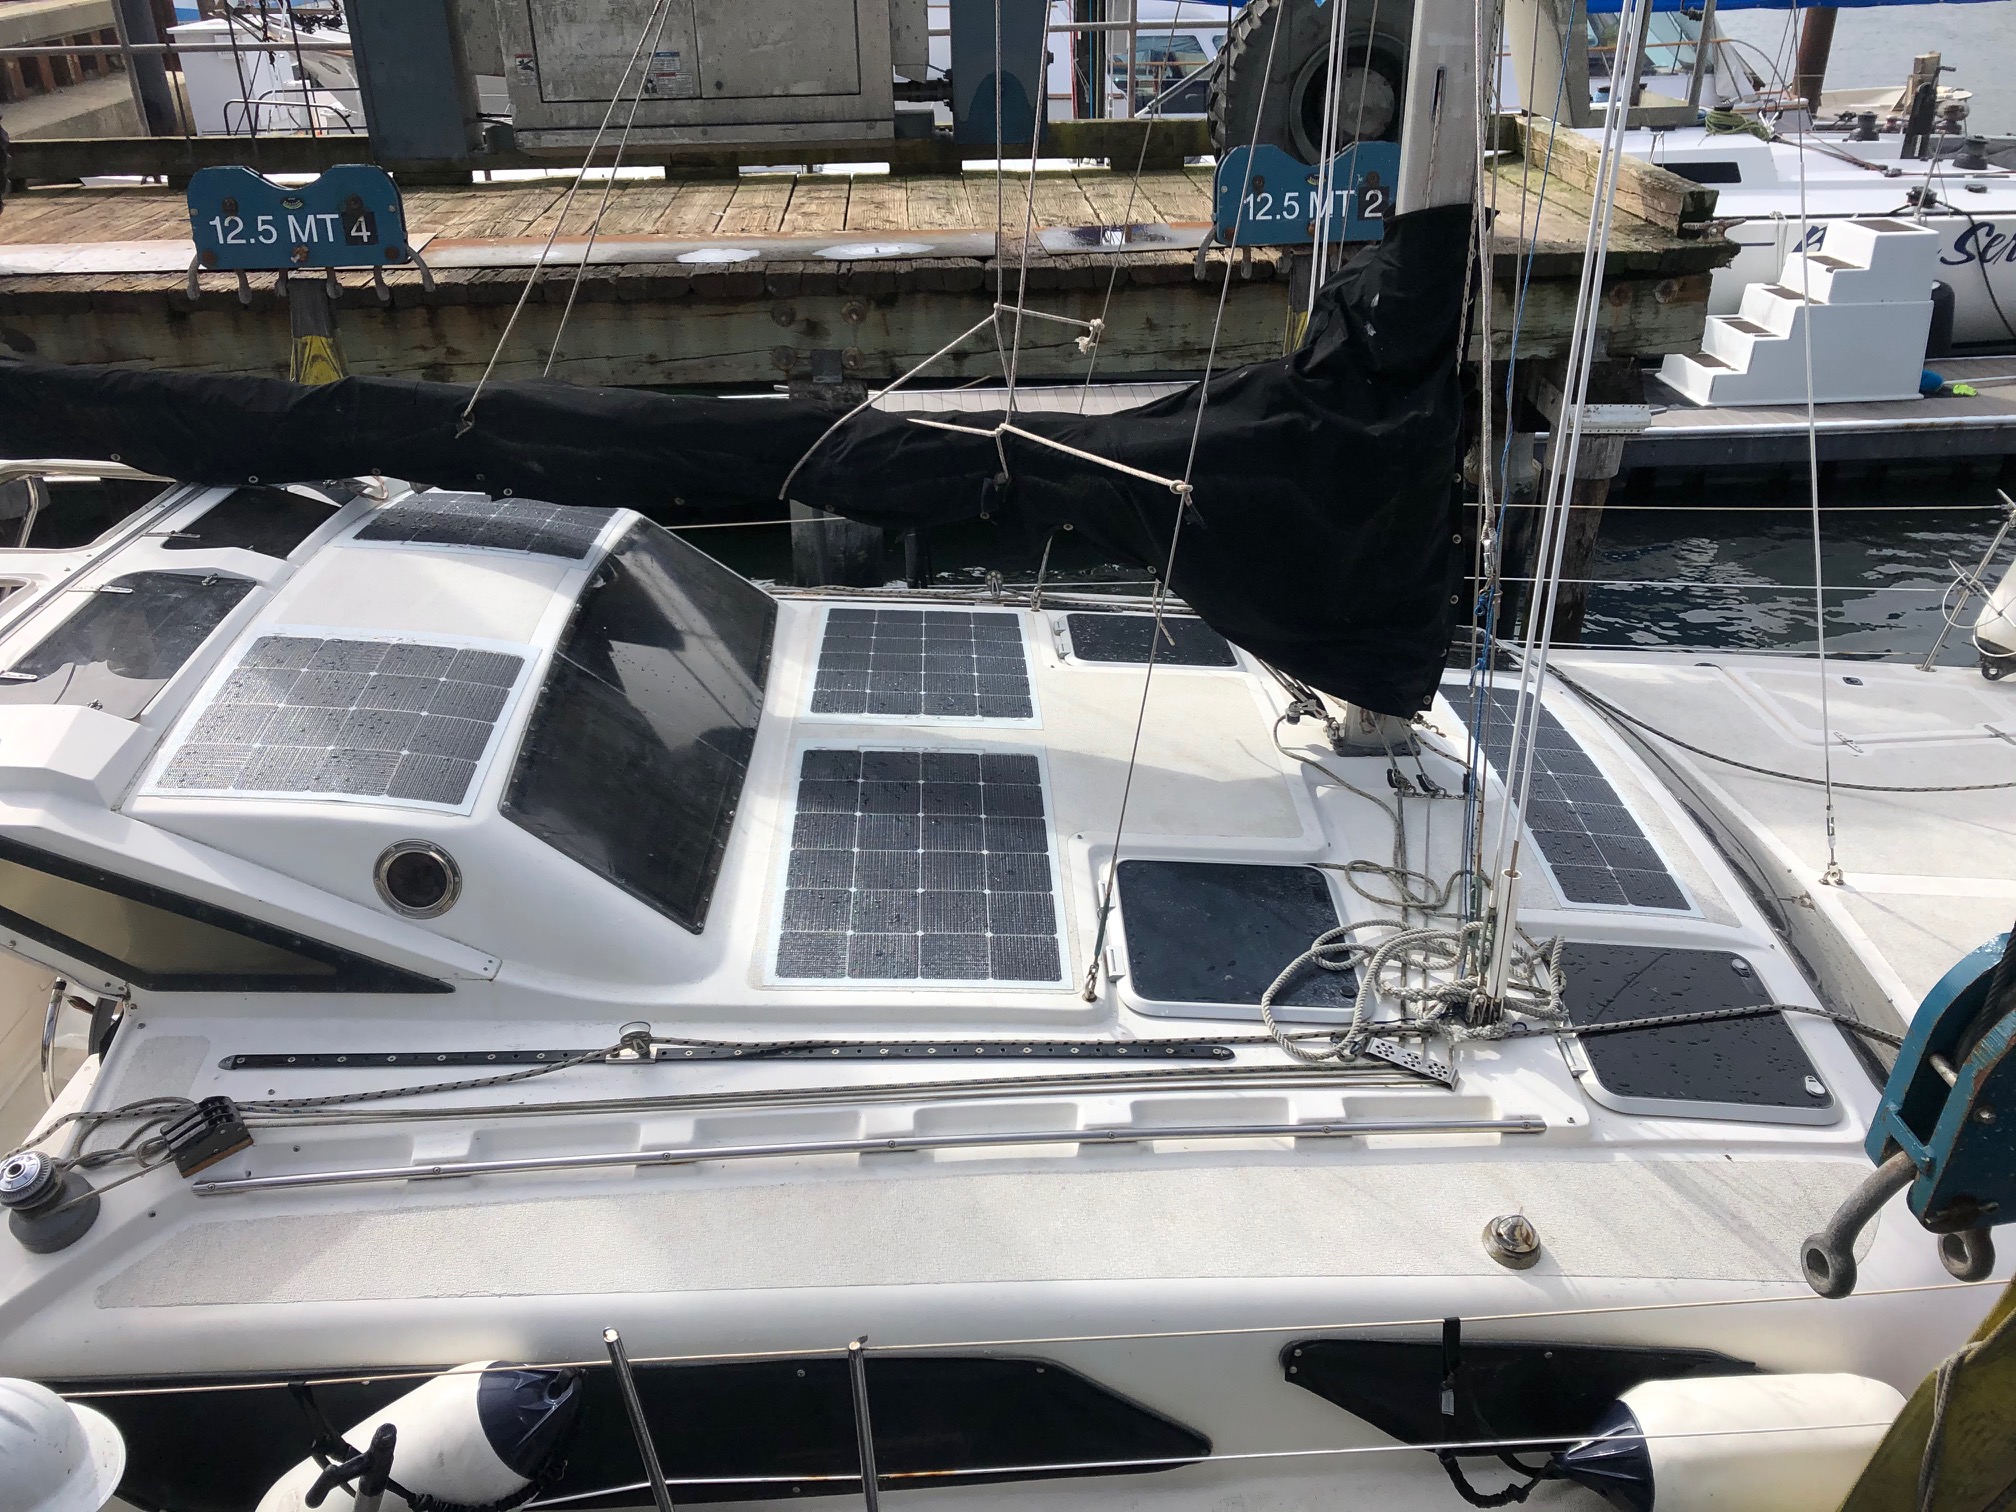
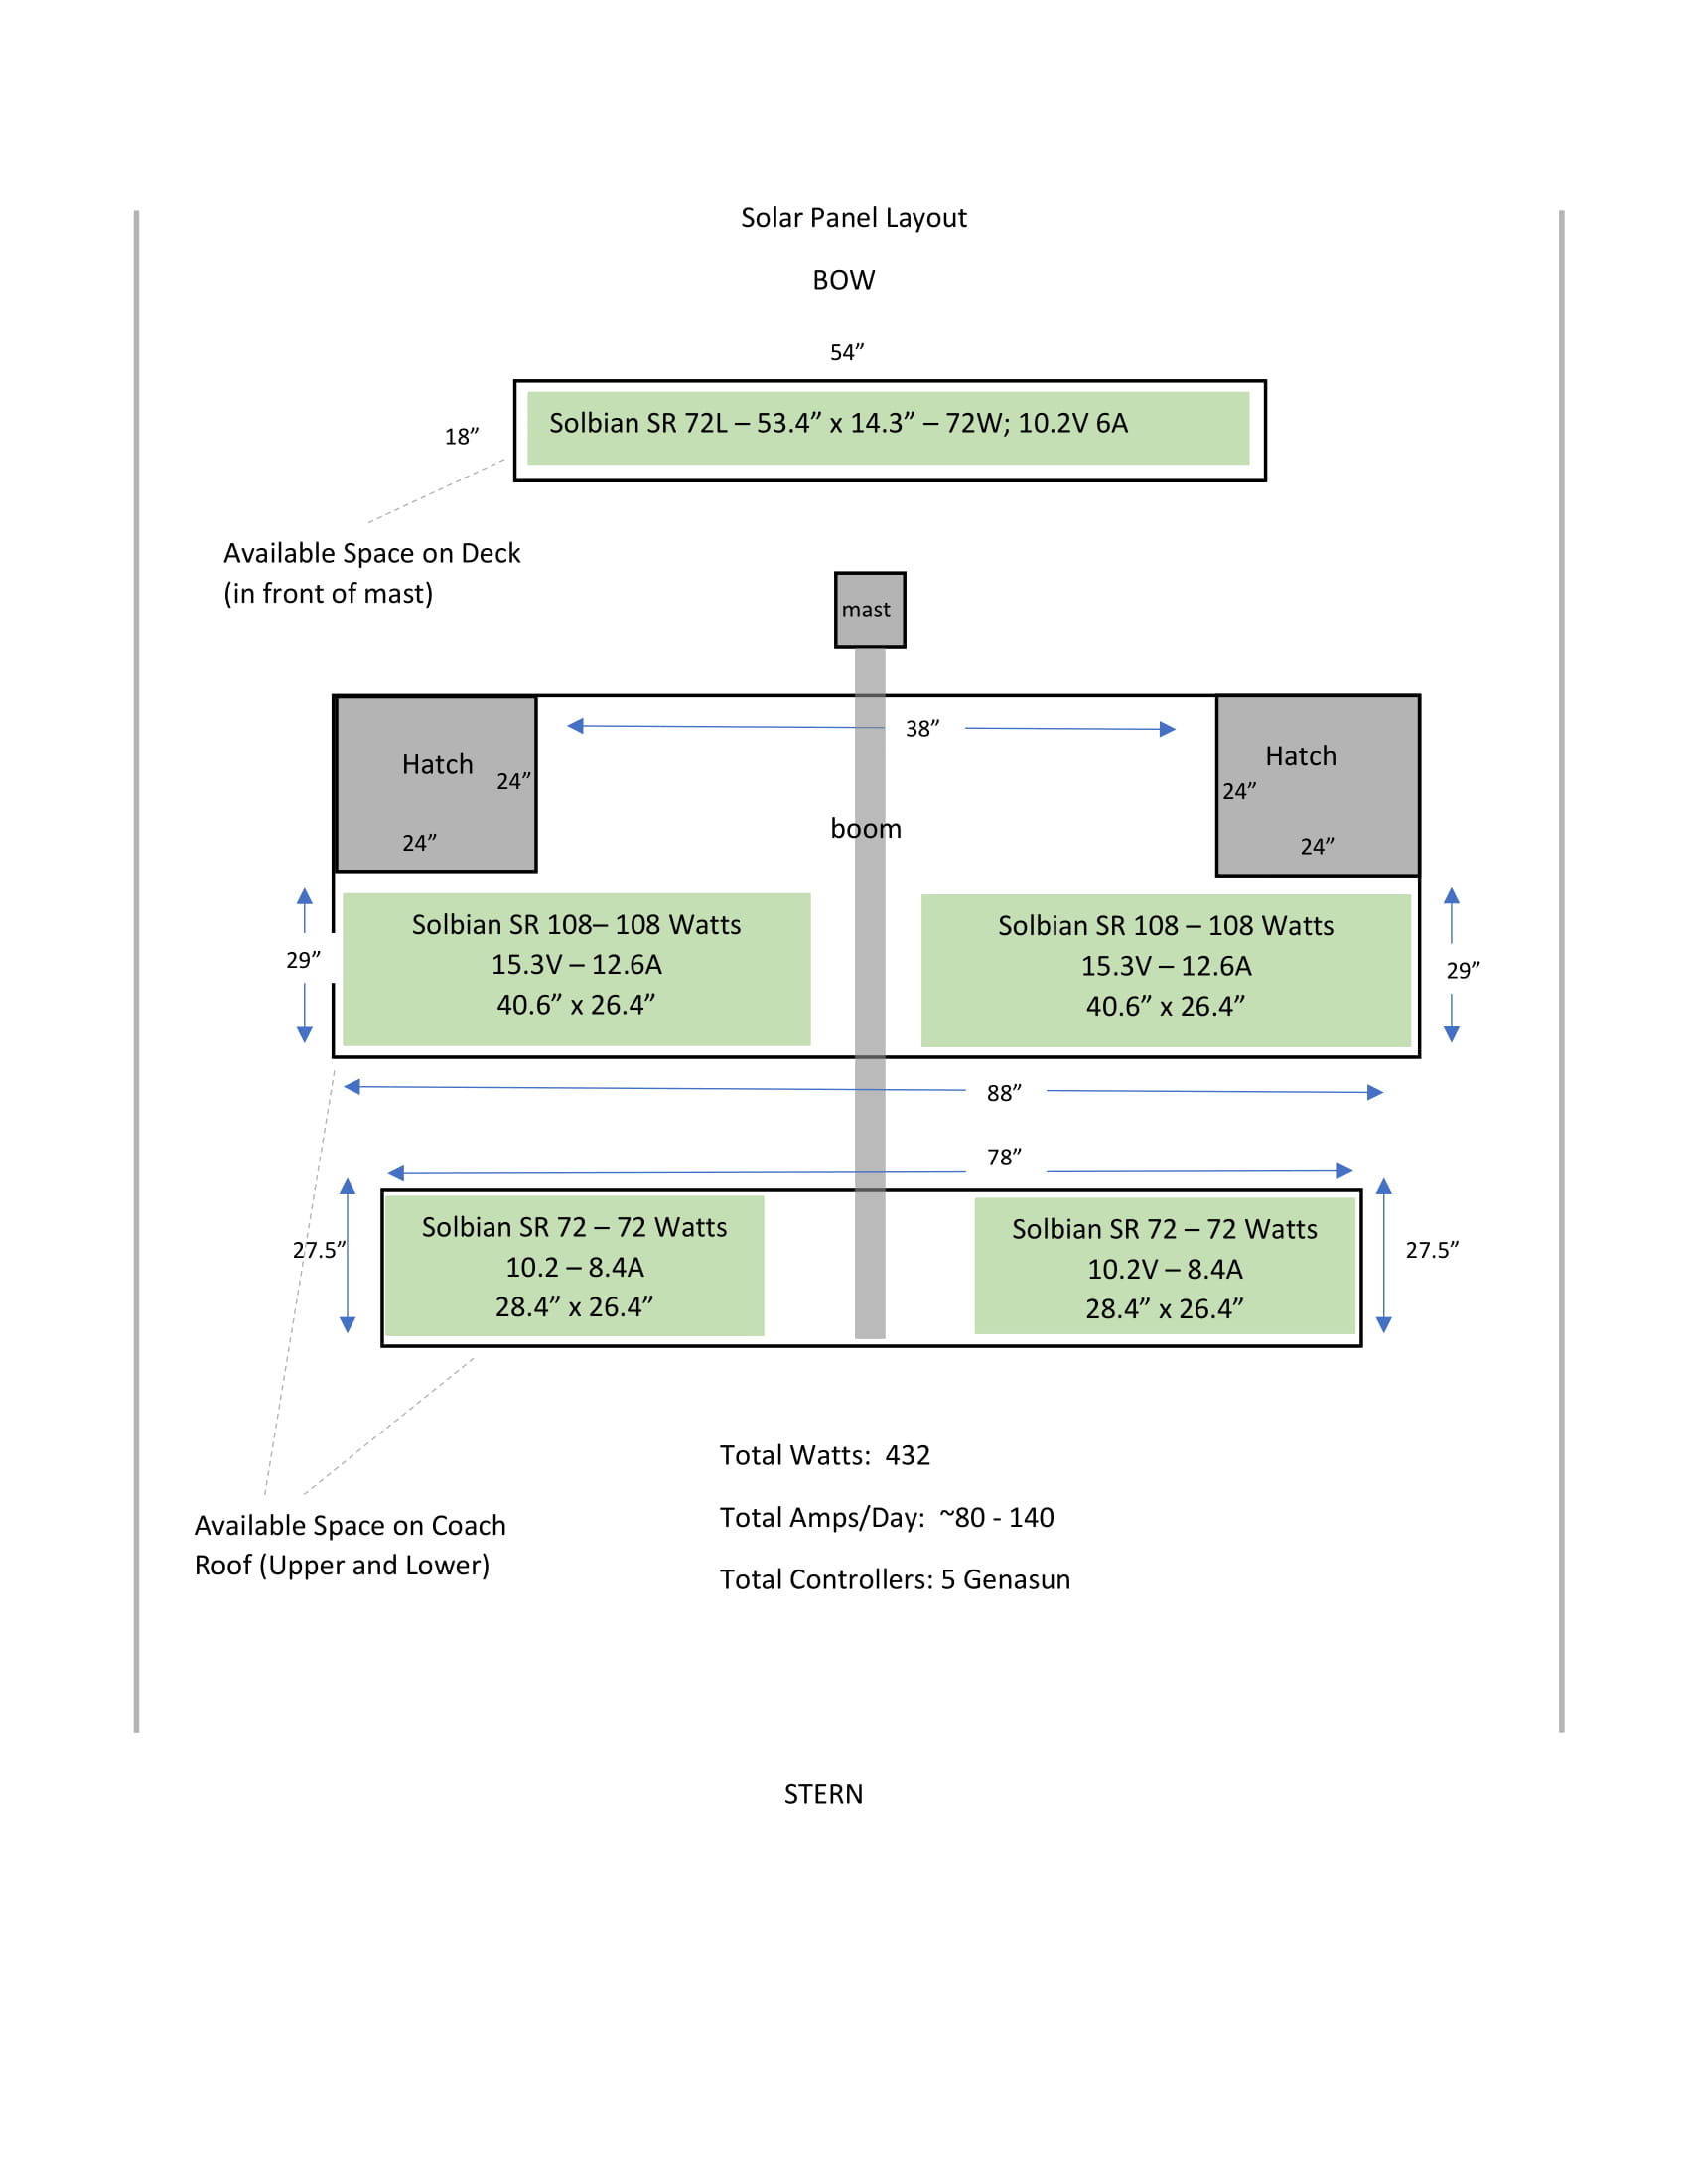
Solbian walk-on solar panels.... because, why not? In all seriousness, with a propulsion system that could be charged while sitting an anchor, I didn't want my house battery to be left out. There is only so much real estate on my cataraman, and I didn't want to add much weight. After quite a bit of exploring, I settled on five Solbian walk-on solar panels. The weight of the panels is negligible (a few pounds each), and they total 432 watts.
My electrical needs on the boat are pretty modest. I have an ultra-efficient Novacool fridge, autopilot, and standard lights and instruments. Long story short, I am able to supply all of my boats house electrical needs with a single lithium 125 amp battery and my Solbian panels. I have yet to drop below 30% charge at any point in time.
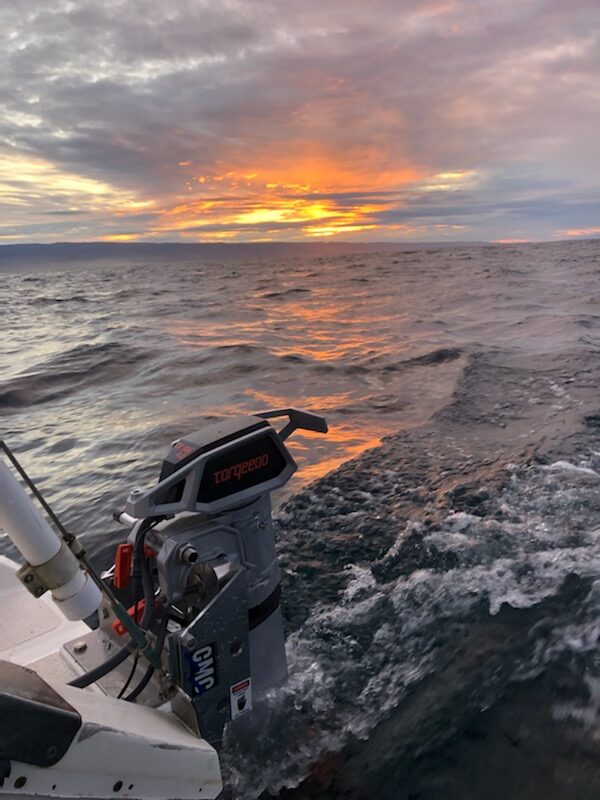
We left the yard in Santa Cruz at dawn and motored all the way to Half Moon Bay (50 miles). Conditions were pretty ideal, but our Torqeedo-centric system performed beautifully. I had heard alarming stories of Torqeedo's challenges in the early days of electric propulsion, and these stories largely revolved around the fact that the outboards simply weren't as rugged as one would like. One reviewer indicated that striking a piece of seaweed caused the outboard to go on the fritz. No such problem on our journey. In fact, we snared a crab pot line (a huge problem during crabbing season here) and the Torqeedo shrugged it off, to our great relief.
On to the Technical Stuff...
Performance
Because I know that many of my fellow Gemini owners are interested in the performance of my electrical propulsion system, I've compiled some observations and data that I hope will be useful.
First, a general observation about my twin Torqeedo 4000 watt outboards (4.0s). I analyzed the power requirements of my Gemini using all of the available data I could find. Interestingly enough, a Gemini has just about the right displacement and hull shape to make electric propulsion manageable. As of the date upon which I am writing this, converting a bulkier cruising catamaran to electric propulsion is a far more daunting project, simply because the power required to move the boat is considerable and the size and cost of the battery bank required to obtain a decent range would be a challenge.
Two Torqeedo 10.0s would have been pretty amazing from a power standpoint (40hp equivalent). However, not only did two 10.0s cost more than I wanted to spend at the time, but one of my biggest concerns was efficiency/range. I worried that the twin 10,000 watt outboards would deplete my battery capacity too quickly. The basic math isn't hard... 10,000 watts per hour x 2 outboards = 20,000 watts per hour. With a 28,000 Wh bank, that's less than 1.5 hours. Even with the 10.0s each humming along at 4,000 watts per hour (for a combined total of 8,000 watts per hour), that's still just 3.5 hours of motoring time. Less power than that, and there is no apparent advantage to the 10.0s. As all sailors know, every displacement boat has a hull speed, and that tantalizing extra knot that comes with a more powerful propulsion system requires a massive increase in energy usage.
All of my number crunching suggested that two 6,000-watt outboards would have been a good match. If Torqeedo had offered this power rating in their lineup, I would have jumped on it. Nevertheless, with the full knowledge that my two 4000-watt outboards might feel a bit anemic, I went for it. To Torqeedo's credit, I do feel that their horsepower equivalency calculations are just about right. My twin 4.0s feel slightly less powerful than my old diesel inboard. Torqeedo indicates that the twin 4.0s produce power that is equivalent to two 8-10hp gasoline outboards (i.e., a total of 16-20hp), and I think this math is accurate.
It's just enough power for my boat, though when charging into a headwind and a big swell, additional power--the equivalent of another 10hp in the gasoline propulsion world--sure would be nice. On the whole, though, I am very satisfied with the setup. My overarching goal was to be able to motor from Santa Cruz to Half Moon Bay (50nm) at roughly 5 knots on one charge, and this is exactly where I landed.
Approximate performance, based on sea trials nearly one year ago and another set of sea trials recently (with a bottom that hadn't been cleaned in a year):
Using Both Torqeedo 4.0s and 28,000 Wh of Torqeedo 24-3500 batteries in mild conditions (negligible wind)
Power Consumption: 6,400 watts (i.e., 3,200 watts each outboard
Speed: 6.0 knots
Range: 26.2 nm
Consumption: 4,000 watts (i.e., 2,000 watts each outboard)
Speed: 5.2 knots
Range: 40.5 nm
Power Consumption: 3,000 watts
Speed: 4.8 knots
Range: 55.6 nm
Power Consumption: 2,000 watts
Speed: 4.2 knots
Range: 62 nm
Power Consumption: 1,500 watts
Speed: 3.8 knots
Range: 77 nm
Economy Mode -- i.e., running one outboard at low power while the other is in the up position and then repeating:
Power consumption: 500 watts
Speed: 2.5 knots
Range: 148 nm*
*with solar charging taken into consideration, range is 185nm
The theme here seems pretty clear. If you want to move fast for a long period of time, electric propulsion may still feel like a daunting proposition. If you are content to motor along at a modest pace, it's a nice solution.
Mounting the Outboards
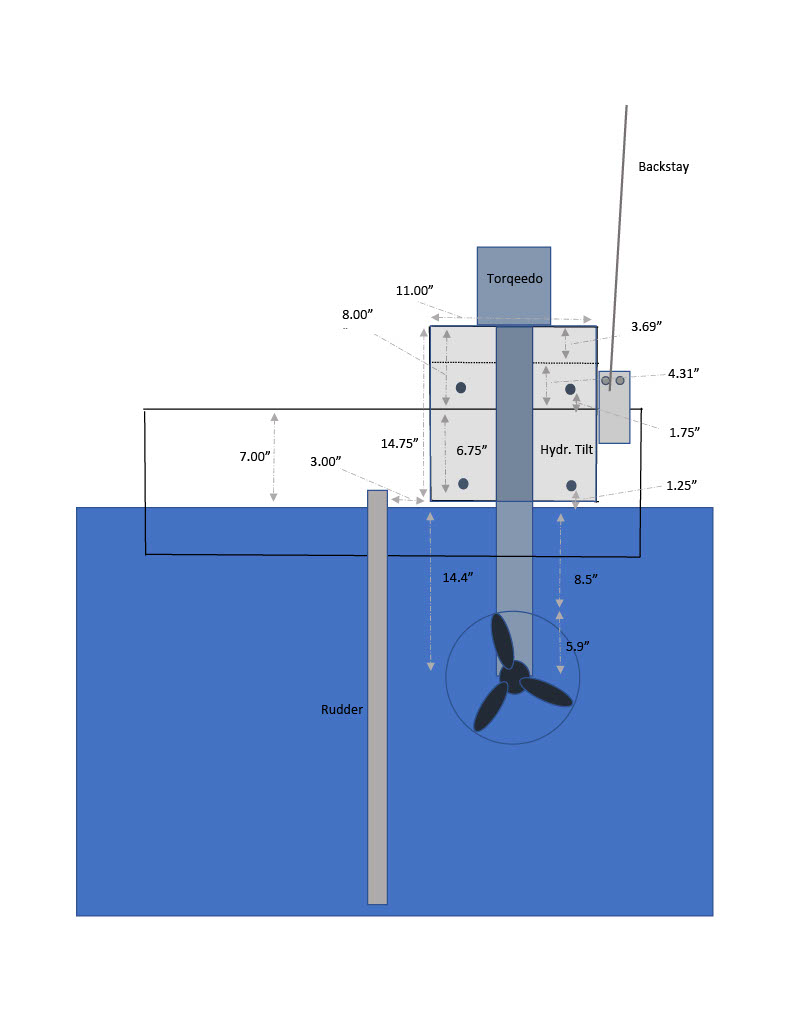
Remember, this is an area in which my calculations were slightly off. All of my math and hard work ignored the fact that my boat sits higher in the water than it did with my old diesel inboard, drive legs, and gas tanks. As a result, I am about 1" off. This is the schematic I used.
In short, I wanted to keep the mounting plate for the power tilts dry while the boat was sitting in port, and I thought a 1.25" margin of error would be about right. If any Gemini owner is interested in installing outboards using this methodology, I would go 1" lower.
Finding literature on the ideal propeller depth was surprisingly difficult. Based on what limited information I could find, the schematic I created appeared to locate the propeller suitably deep to avoid popping out and/or cavitating excessively in swell. For the most part, the location works well (subject to the 1" adjustment I suggest, which would be ever better). I found that my old drive-leg and associated prop would cavitate a bit and pop out in moderate to large swell, and I can't say that the Torqeedo setup feels much different.
Location of Batteries
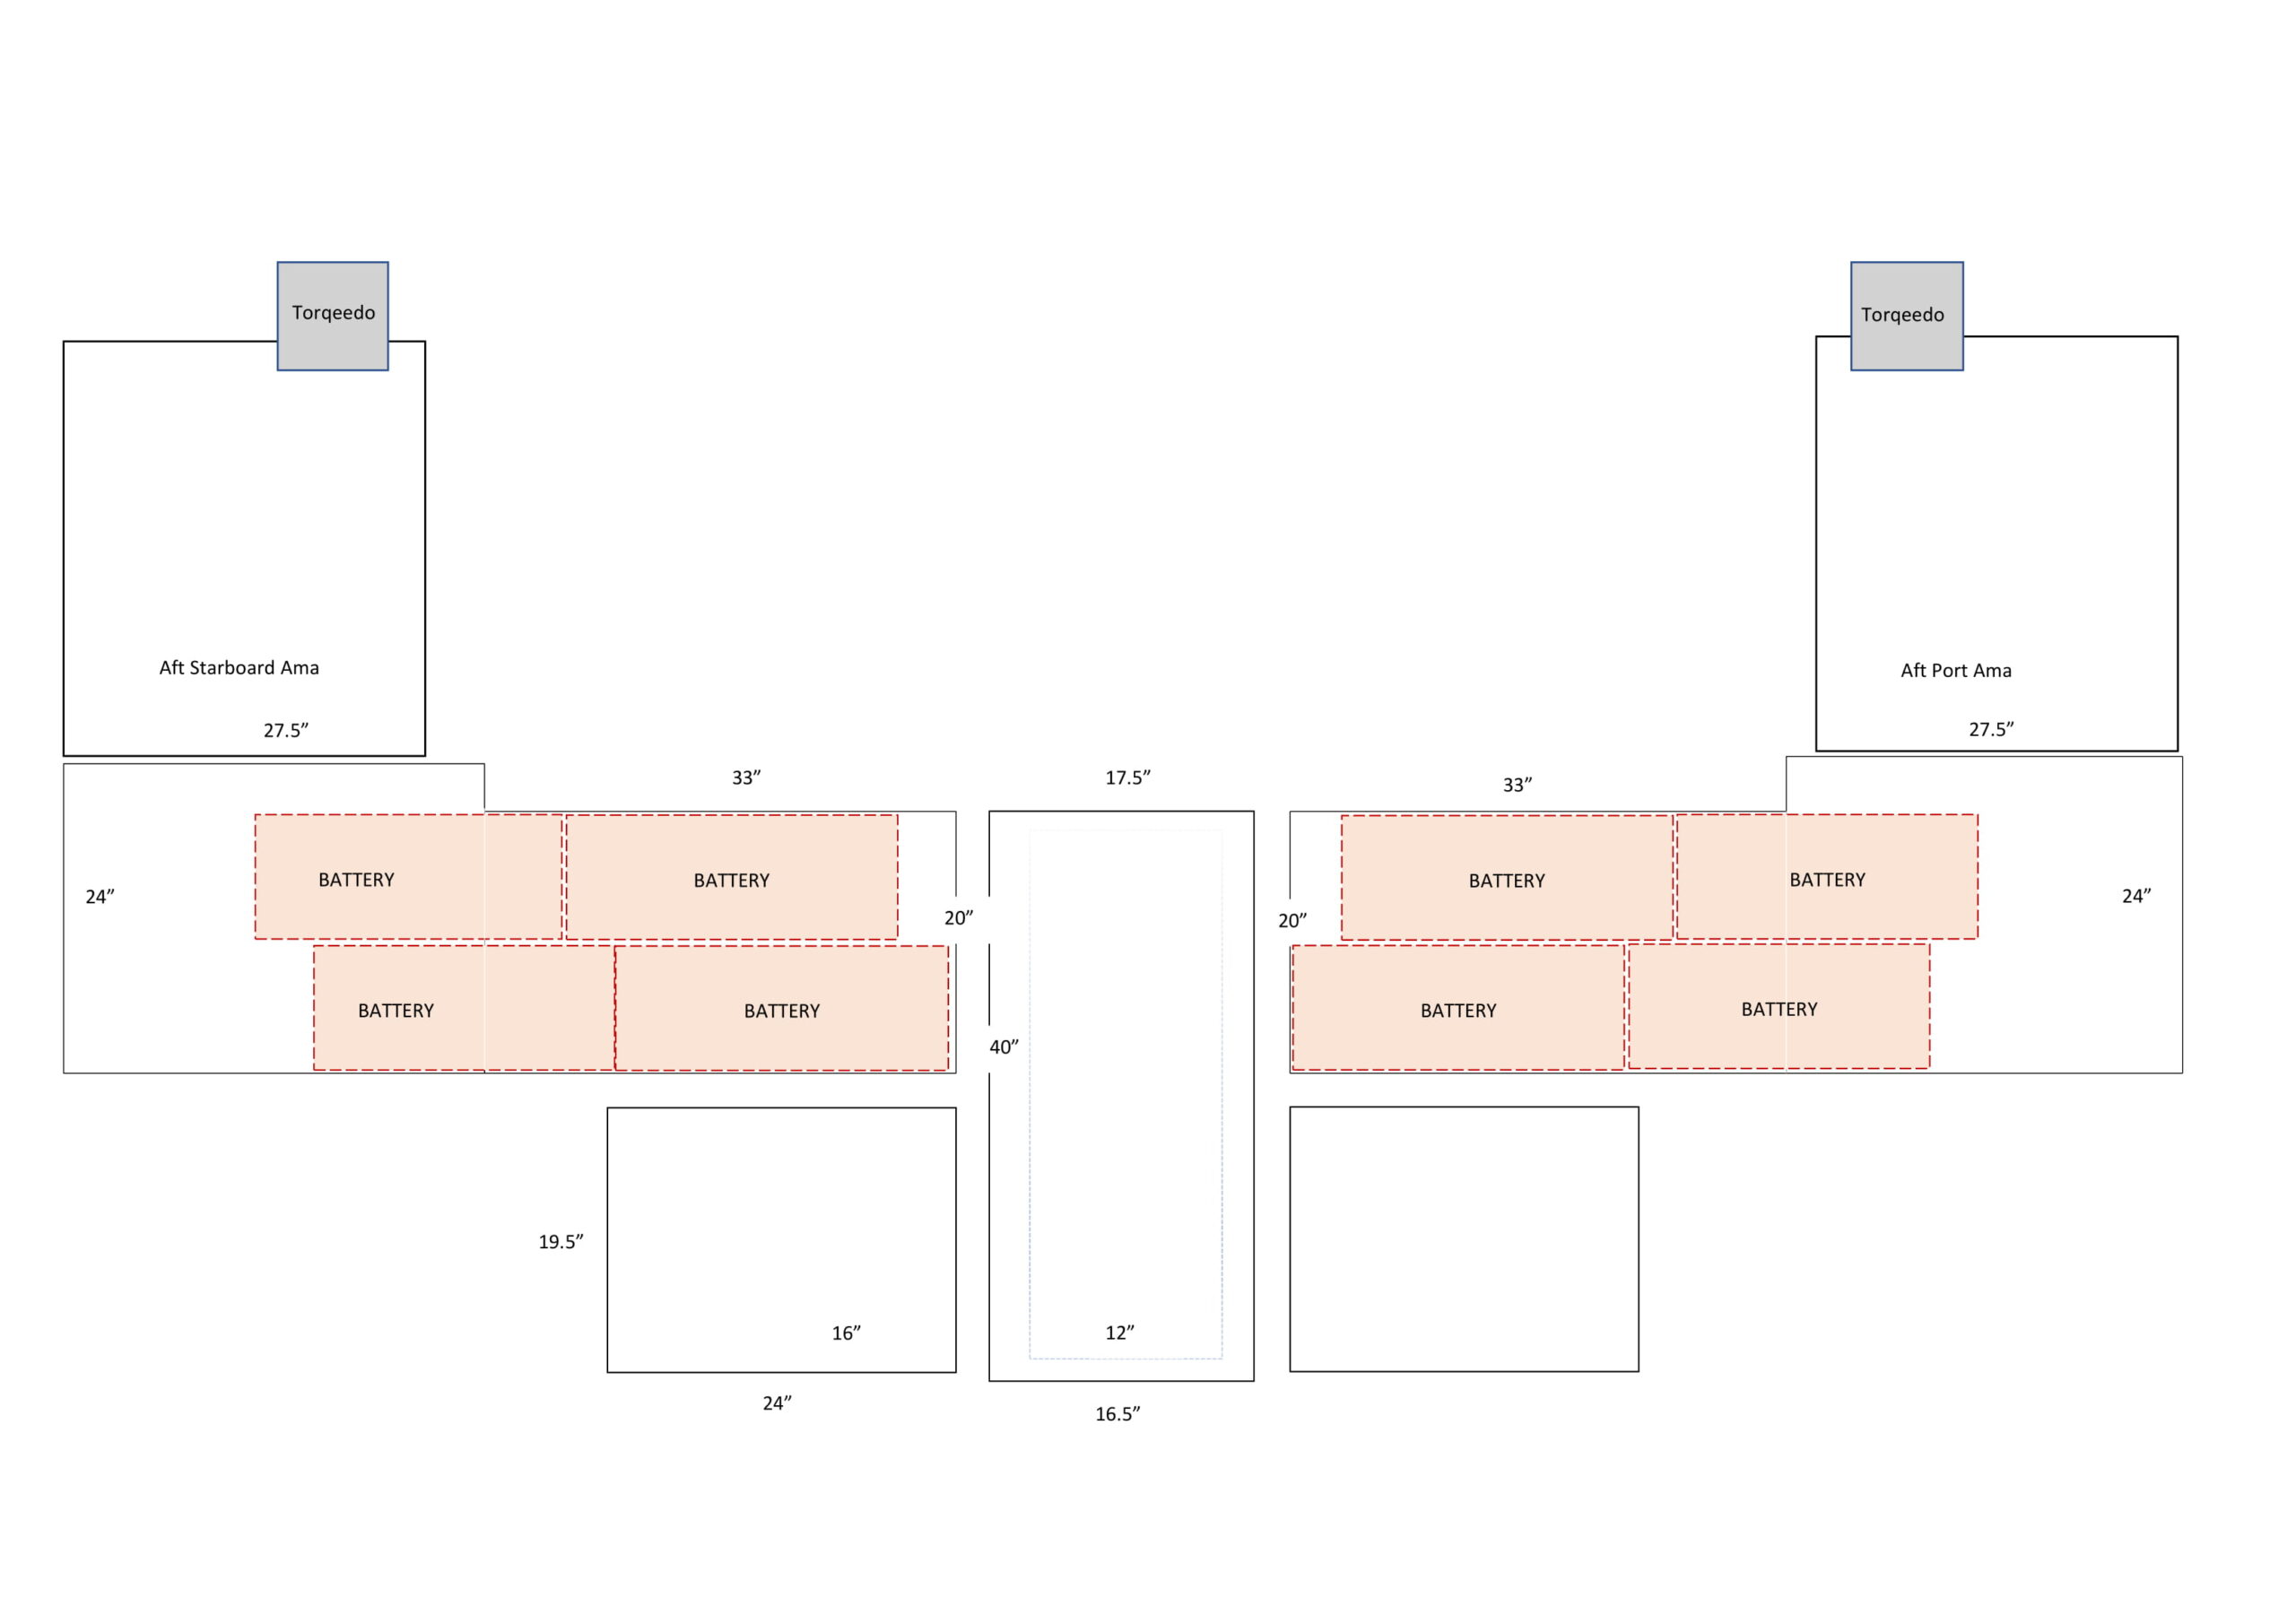
Gemini owners will certainly be familiar with all of the aft compartments on the boat. I measured the various compartments and considered how the weight of the batteries would be distributed when choosing the location. As I noted earlier, the Torqeedo 24-3500s just happened to be exactly the right size to squeeze into the compartment that formerly contained the gas tanks. Given the weight of full tanks, it seemed sensible to get the weight of the batteries in roughly the same location.
Disclaimer: This diagram isn't perfect, but it should give you a clear sense of where the batteries are located in relation to all of the aft compartments on the boat.

Battery Comparison
I shopped around extensively before choosing Torqeedo batteries. I like data, so I compiled a chart that contains a few key metrics. Just for a point of comparison, I also included two decent AGM batteries. Three things mattered the most to me:
(1) Safety: Hard to quantify, but I wanted a battery from a reputable manufacturer who was well versed in marine applications. In other words, the battery better have a good BMS with relevant safety features.
(2) Energy Density: I used the ratio of Wh/lbs to calculate energy density. Torqeedo came out as the clear leader when it comes to reputable manufacturers of marinized lithium batteries. The DH Gate option serves as a warning. The energy density is appealing, but be careful... Unless you are an electrical engineer and you are confident you aren't going to burn your boat to the water line, I would steer clear. Because I don't want you to die, I'm not going to list the specific manufacturer.
(3) Cost/Wh: Yes, budget matters. Battleborn is a very reputable manufacturer of lithium ion batteries, and their price point was slightly better than Torqeedo. That said, their batteries are considerably heavier, and because they are 12v, you would need to connect four batteries in series to get the correct incoming voltage.
Torqeedo's batteries were significantly lighter and slightly cheaper than their chief competitor (E Propulsion). Combined with the fact that Torqeedo's batteries are designed to communicate directly with their throttles, the choice of the 24-3500s became an easy one for me. The 48-5000 battery was also very appealing, but only two 24-5000s batteries can be mounted in parallel. This means choosing four 3500s instead of two 5000s (per bank) increased the total combined capacity of my two banks by nearly 7,000 watts.
Solar Chargers
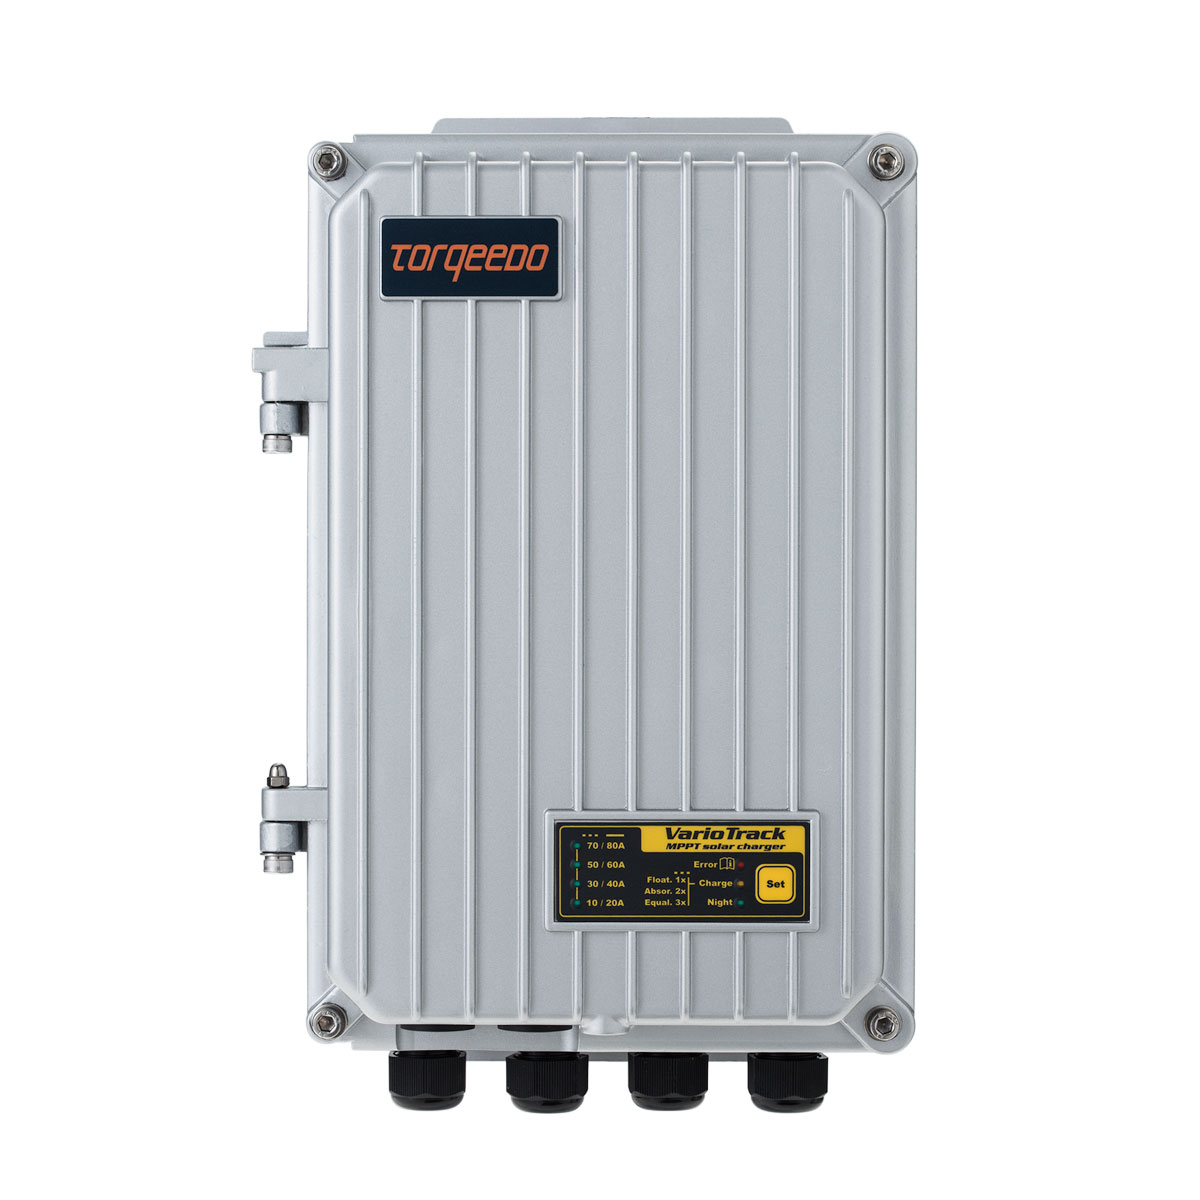
I did a bit of research, and it did seem that Torqeedo's fast solar chargers were the way to go. They aren't particularly cheap, but they do work very well. Torqeedo understandably prefers that purchasers of their batteries use Torqeedo chargers. I did review some alternatives before settling on their solar chargers, though.
Because Torqeedo recommends one charger for each panel, and I am drawing solar from two very large Panasonic panels, I purchased two chargers. As noted earlier, sitting at an anchorage in moderately sunny conditions will charge the 28,000 Wh battery bank in about a week.
AC Chargers
This AC charging element of my electrical propulsion system took the most thought. With an acknowledgment that a twin-outboard, eight-battery setup isn't exactly what Torqeedo had in mind as a typical arrangement, I found that the AC chargers they offered just weren't quite right for me. Let me explain why:
Here were my initial requirements: I wanted to be able to fully charge the two battery banks overnight. This was very important to me, as I could easily imagine hopping up the coast and staying one night in various locations.
Torqeedo offers a standard charger, but to achieve my goal of overnight charging, I would have had to purchase eight chargers (one for each battery). This felt excessive. In addition, it would take 15 hours to charge the banks fully, which felt a bit slow.
Torqeedo also offer a high-speed charger, but it is not cheap and also appears to be optimized for 240volt/50 amp shore power. Like most sailboats, my Gemini is wired for 120 volts. With a standard 120v, 30amp inlet, simple math indicates a maximum of 3,600 watts is theoretically available. Counting on more than 80% of this amount to be usable on a continual basis without causing problems seems foolhardy, so my basic math indicates that relying on something like 2,900 watts for extended periods of time is more reasonable. I know this isn't terribly precise, and I hope that my electrician friends will forgive me for oversimplifying, but I do know that relying on a 120v pedestal to continually pump out 120v and 30amps is foolish.
Torqeedo's high-speed chargers pull 750 watts. Four of these chargers would be required to charge the banks. The total power system consists of two "banks" of four batteries each (connected in series/parallel). In short, four of these charges would attempt to pull 3,000 watts on a continuous basis, and this might be an issue for the pedestal. More daunting still, four of these chargers would cost a pretty penny ($8,000).
Because neither the standard Torqeedo chargers (too slow and too many required, also expensive at $4,800 total) nor the high-speed Torqeedo chargers (a tad too power-hungry and expensive at $8,000 total) seemed to fit the bill, I had to look elsewhere. Before doing so, I did communicate with Torqeedo to make sure I wasn't going to somehow jeopardize the health of my batteries.
The Torqeedo 24-3500 batteries want to be charged at 29.05v, which is a rather unique charging voltage. I didn't feel that deviating from this in any significant way was sensible, so I shopped around like crazy to find chargers that met this requirement. Based on the math above, something like 29 volts and 25 amp (725 watts) would have been ideal and hit the maximum safe extended realistic load exactly on the head. Well, I am here to say that as far as I can tell, no such charger exists. Progressive Dynamics gets close with a reasonably priced 29v, 30amp charger, but again, four of these is just a bit too much for a 120v pedestal, and the chargers themselves weren't designed specifically for marine use.
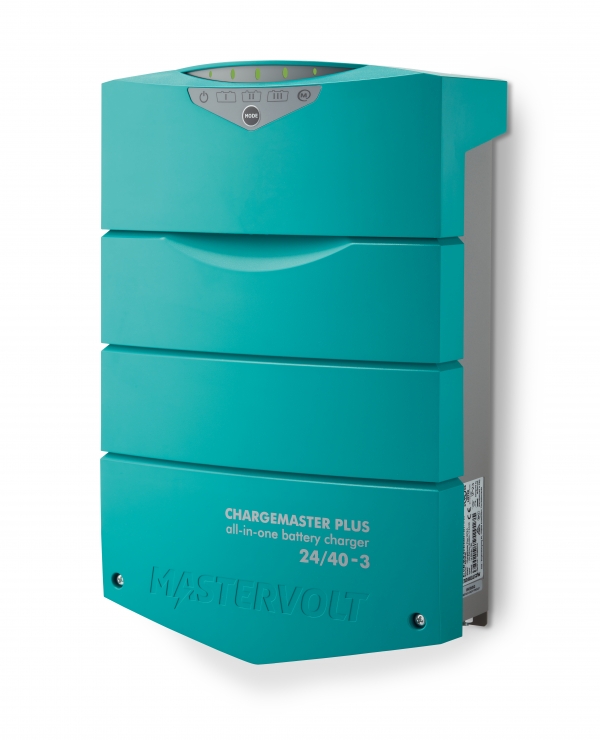
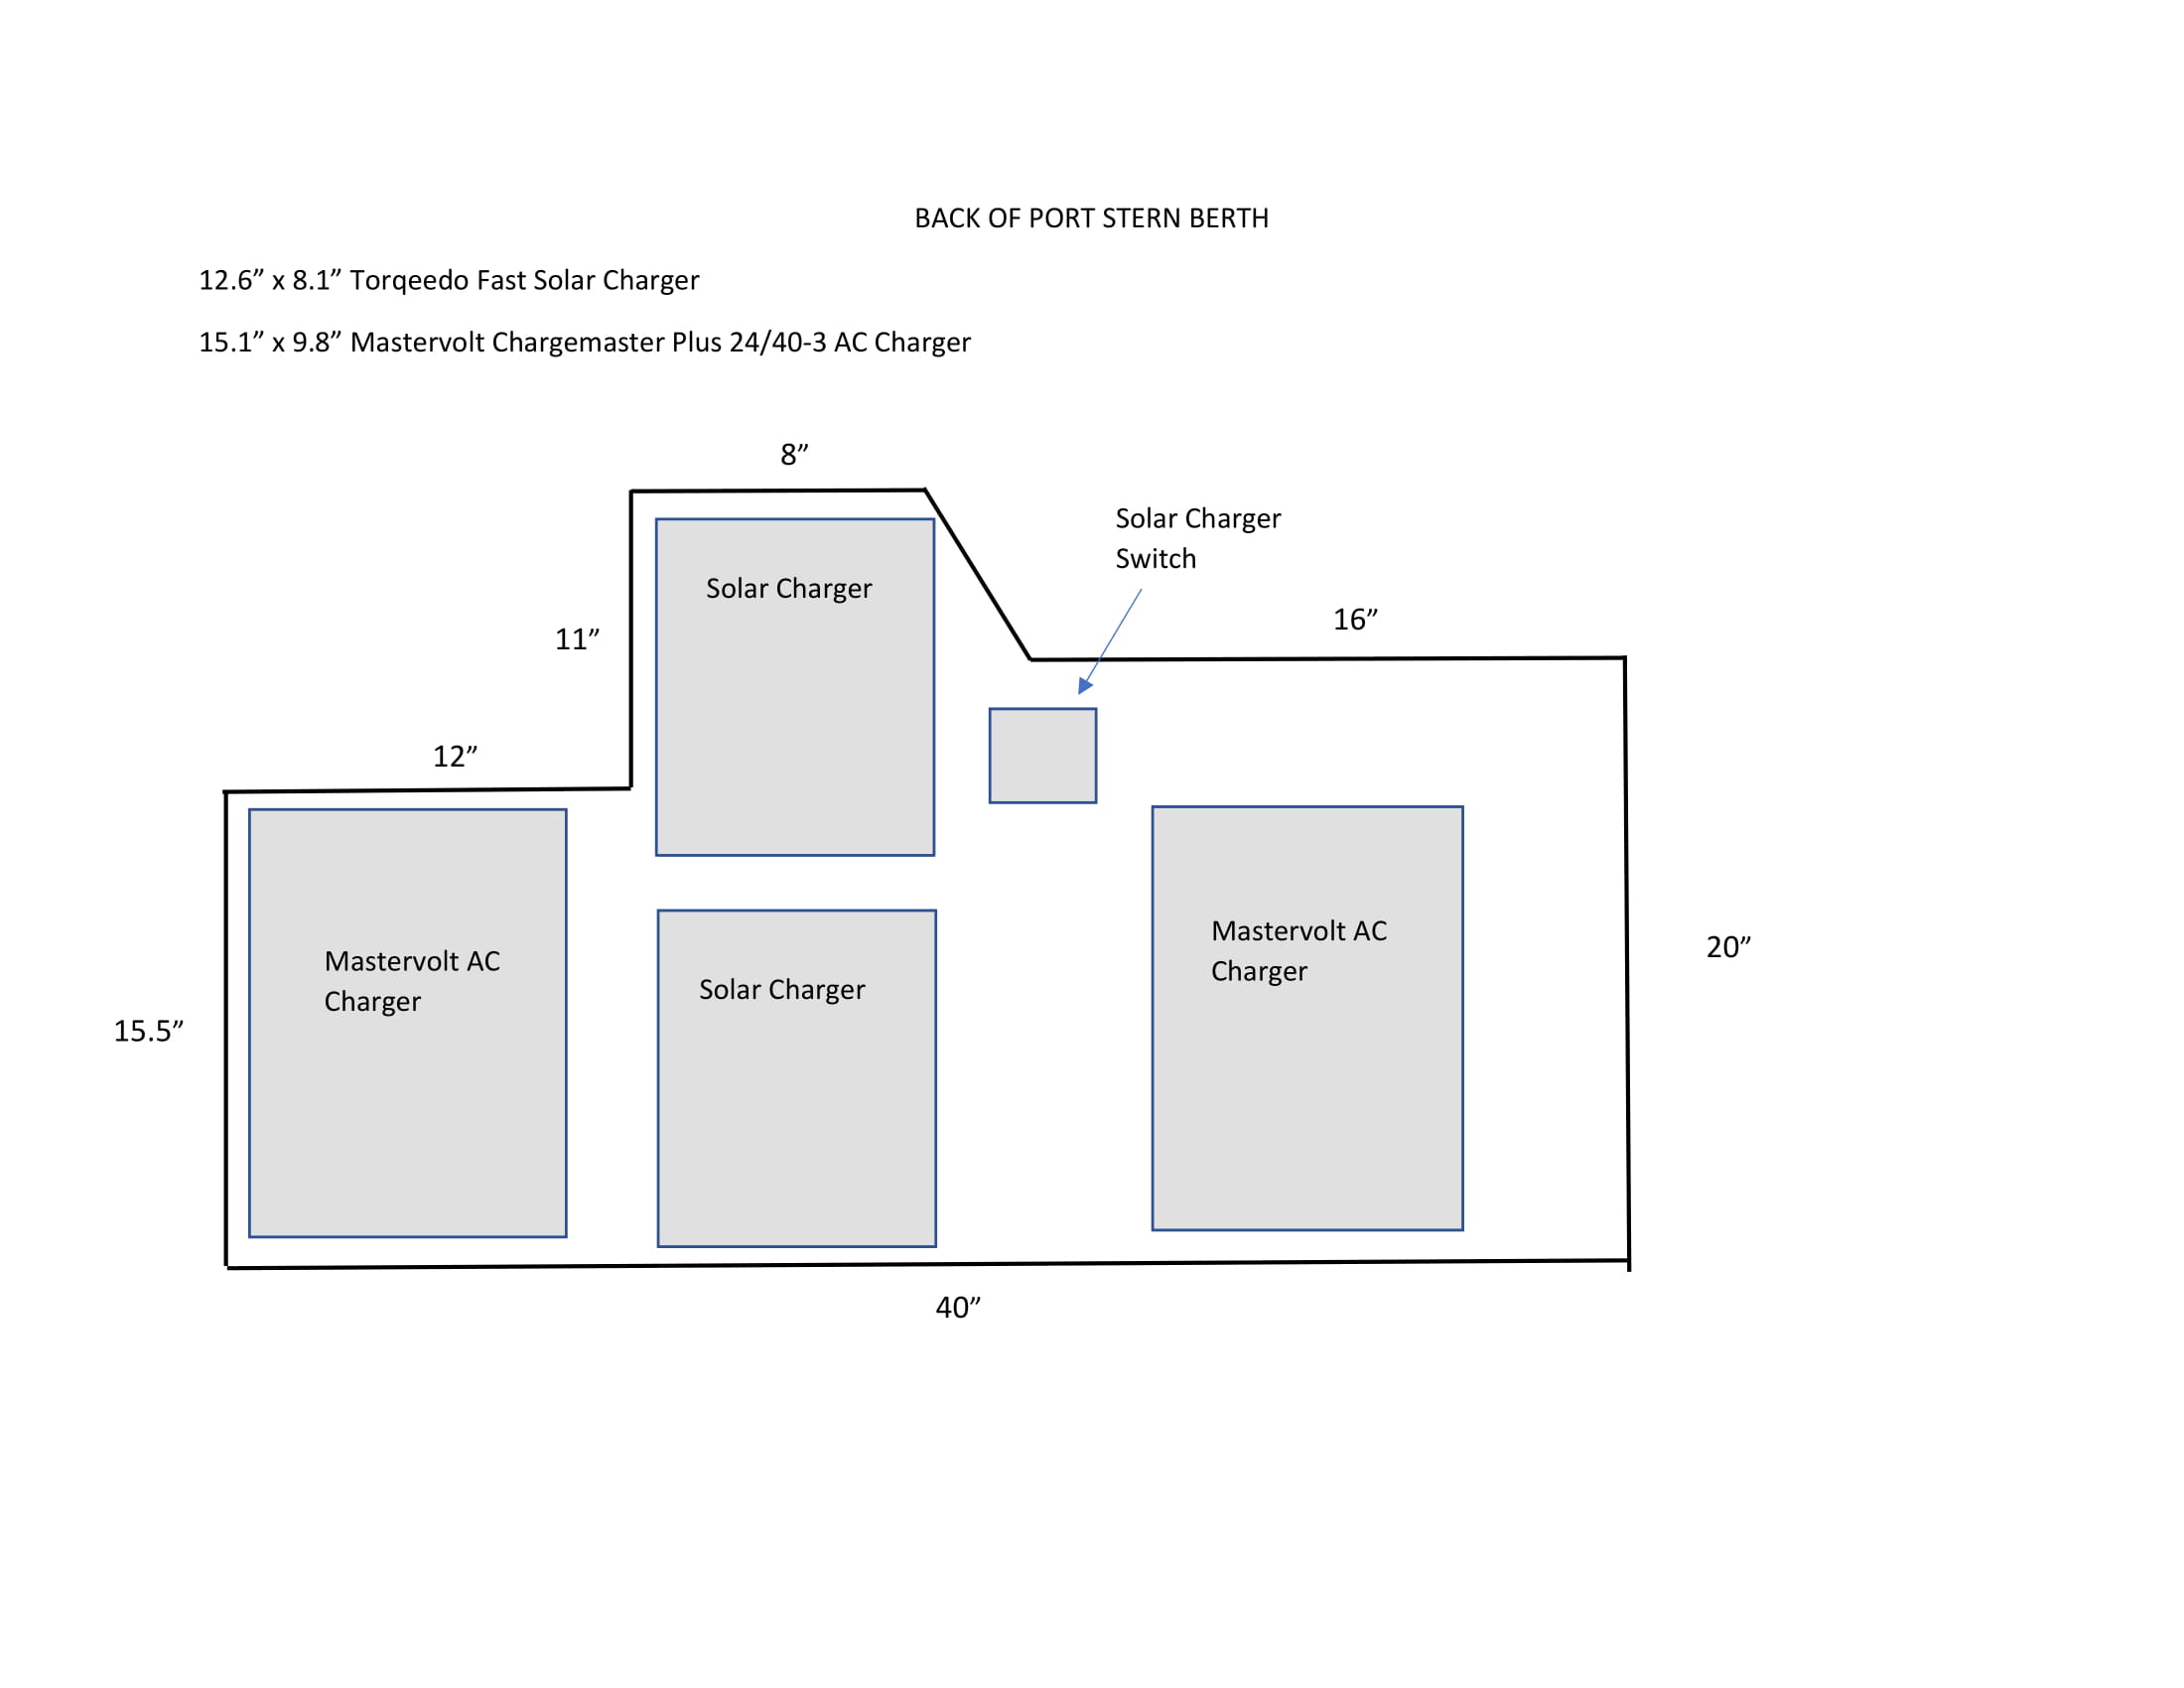
All was not lost, thankfully. Mastervolt, which manufacturers very high-quality products for marine applications, has a series of programmable chargers. I learned that I could customize a charger to a fairly precise charging voltage using my laptop and also limit the A/C draw. This was ideal, of course. The charger that fit the bill was the Mastervolt Chargemaster Plus 24/40-3. I found the chargers for $725. Suddenly this felt like a no-brainer. Though a bit bulky, these chargers have proven exceptional.
[UPDATE: Indeed, I liked the programmability of the Mastervolts so much, I cut the charging time of my two banks in half by adding a second 120v, 30amp inlet and two additional chargers. As a result, if I am either (a) at a berth that offers 240v/50amps, with the use of a Y adapter, or (b) at a berth that allows me to access two separate 120v/30amps outlets, I can fully charge my banks in approximately 6.5 hours. This has worked beautifully.]
The diagram I've included is simply a very rough schematic which shows how the first two chargers are mounted on the rear wall of the port-side aft cabin. The additional two charges I subsequently added are on the adjacent wall.
Solar Panel Layout
Though this really doesn't have anything to do with my electric propulsion conversion, because I know that sailboat owners are often interested in efficient ways to generate energy, I thought I would include a quick overview of how the Solbian walk-on panels I purchased are mounted on the coach roof. The diagram indicates the available space on the coach roof of a Gemini 105M and shows the approximate location of the panels.
With respect to performance, I'm very pleased. The panels do produce plenty of energy for my house battery needs, and the textured surface of the panels is grippy enough to make walking on them barefoot feel safe. Mounting them properly took quite a bit of sanding, but the end product was worth the work. The panels have now been installed for over three years and I have experienced absolutely no degradation in performance. For controllers, I use five Genasun MPPT Solar Charge Controller GVB-8-Li-14.2V. They do a nice job of boosting the income voltage to the appropriate level and are extremely compact and light weight.
Many thanks to Devin Trainor at Ocean Planet Energy for the help in designing my solar system: www.Oceanplanetenergy.com
Mammacita Bonita, My Portland Pudgy
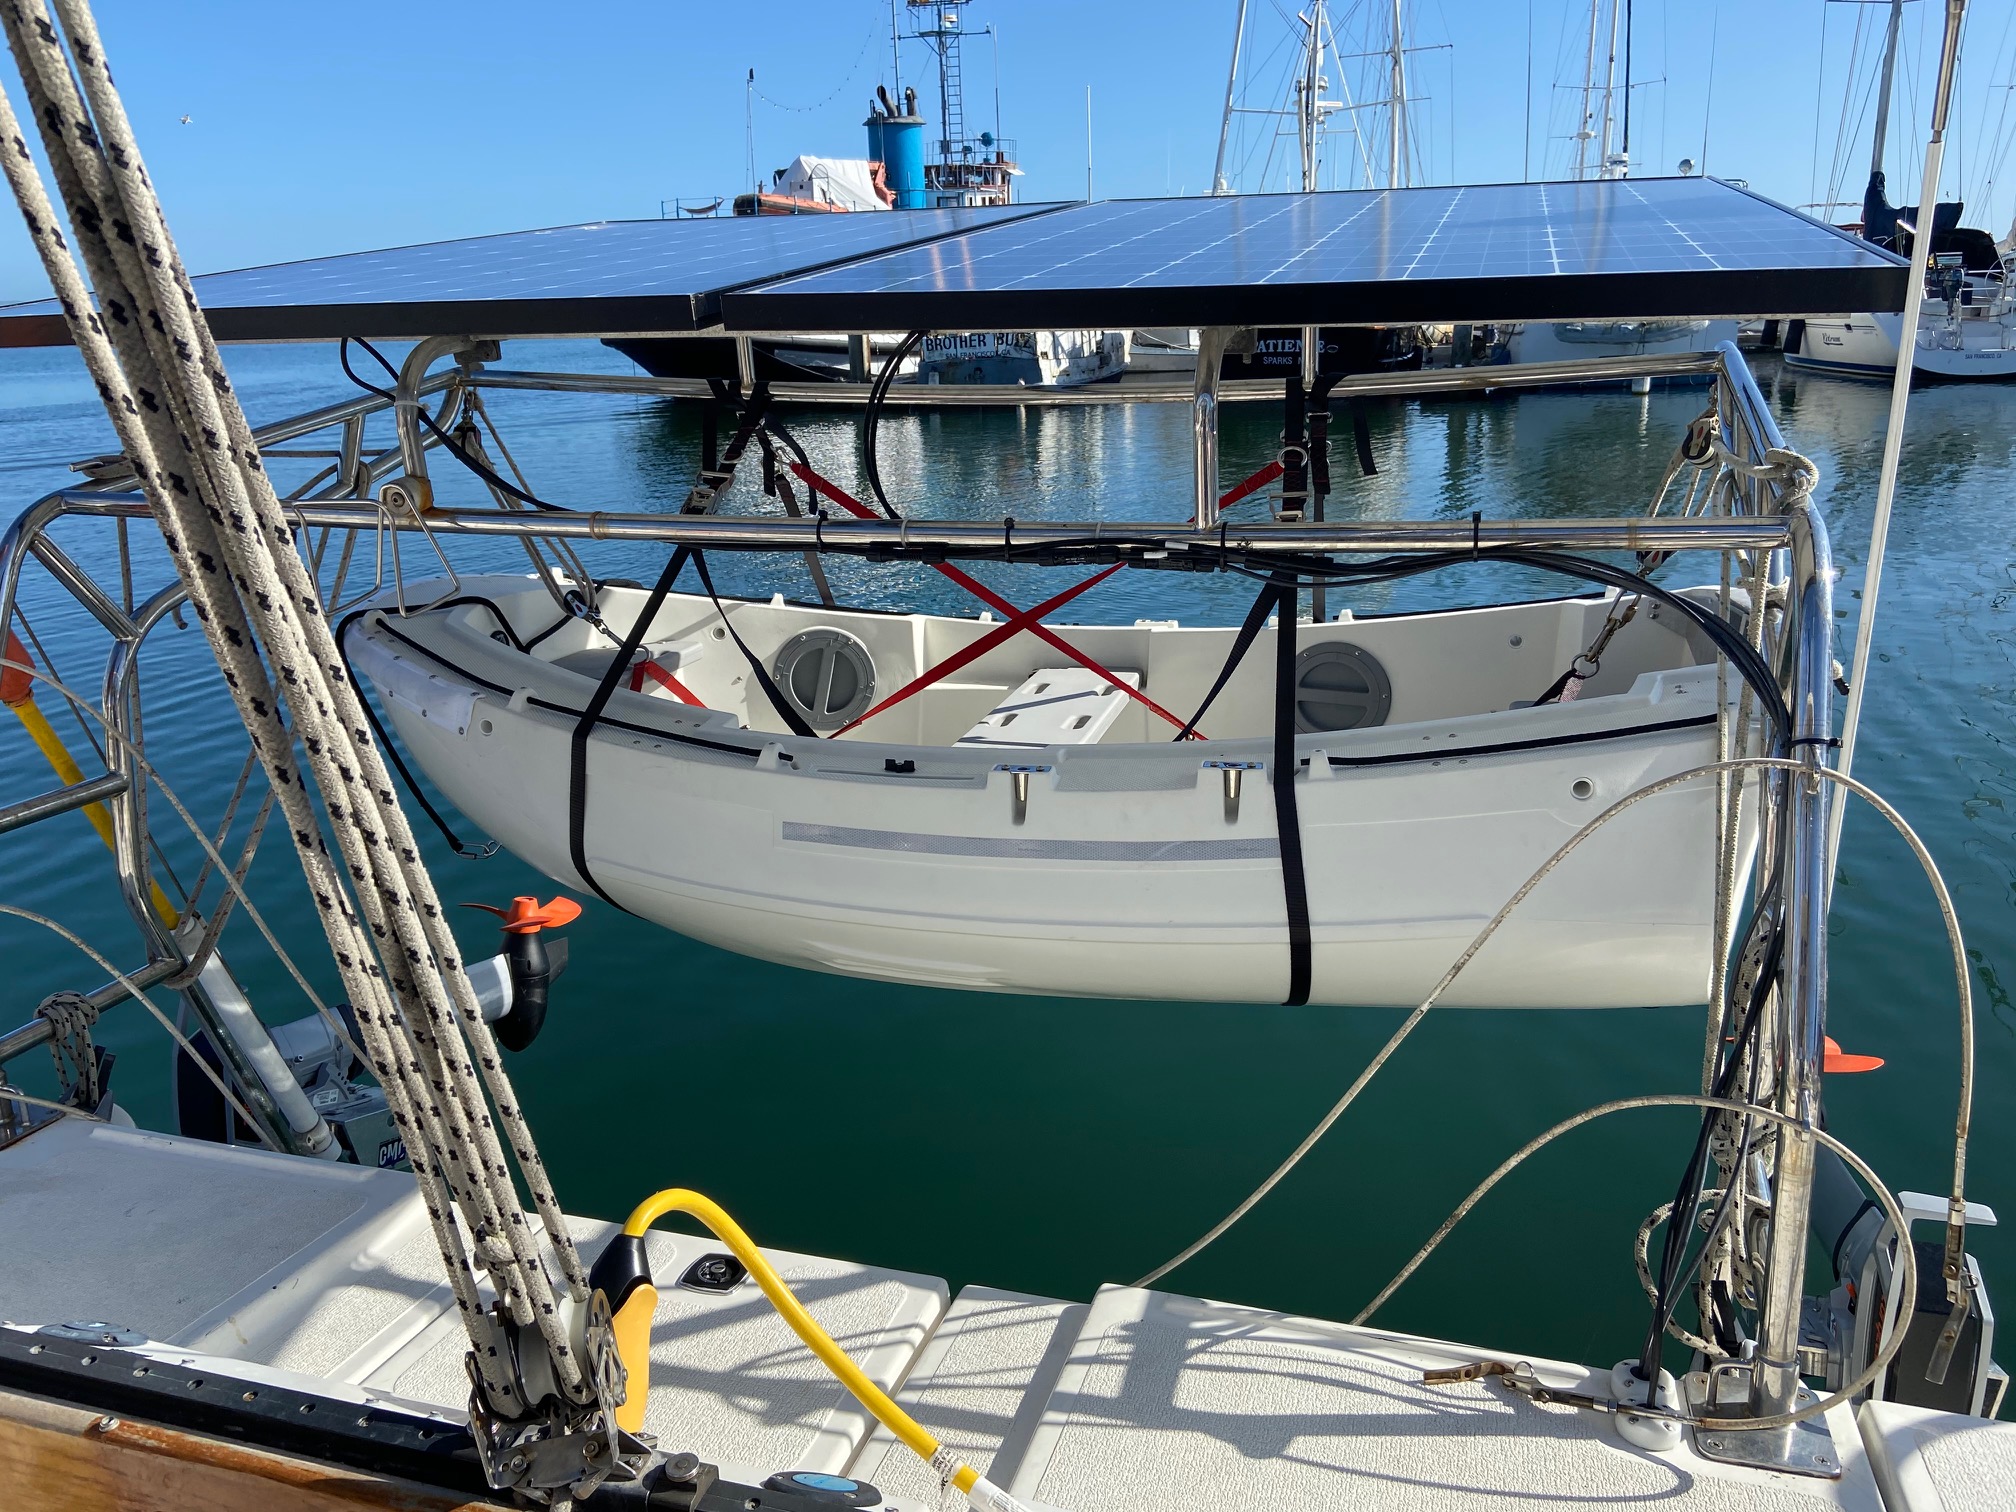
My boat did not come with a dinghy when I purchased her, but I did have a solid set of dinghy davits pre-installed. I considered various conventional options, from a hard dinghy to an inflatable. As I poked around and reviewed options, I came across the Portland Pudgy. This adorable little marshmallow of a dinghy doubles as a Coast Guard-approved lifeboat capable of carrying a considerable load.
The Pudgy is easy to right and can be customized with a lifeboat canopy kit, sea anchor, sailing kit, etc. I like the fact that it is incredibly rugged and moves decently with my Torqeedo travel motor. Most importantly, I appreciate the fact that the Pudgy is super buoyant and does indeed feel preferable to a more traditional lifeboat and the accompanying potential inflation-related issues.
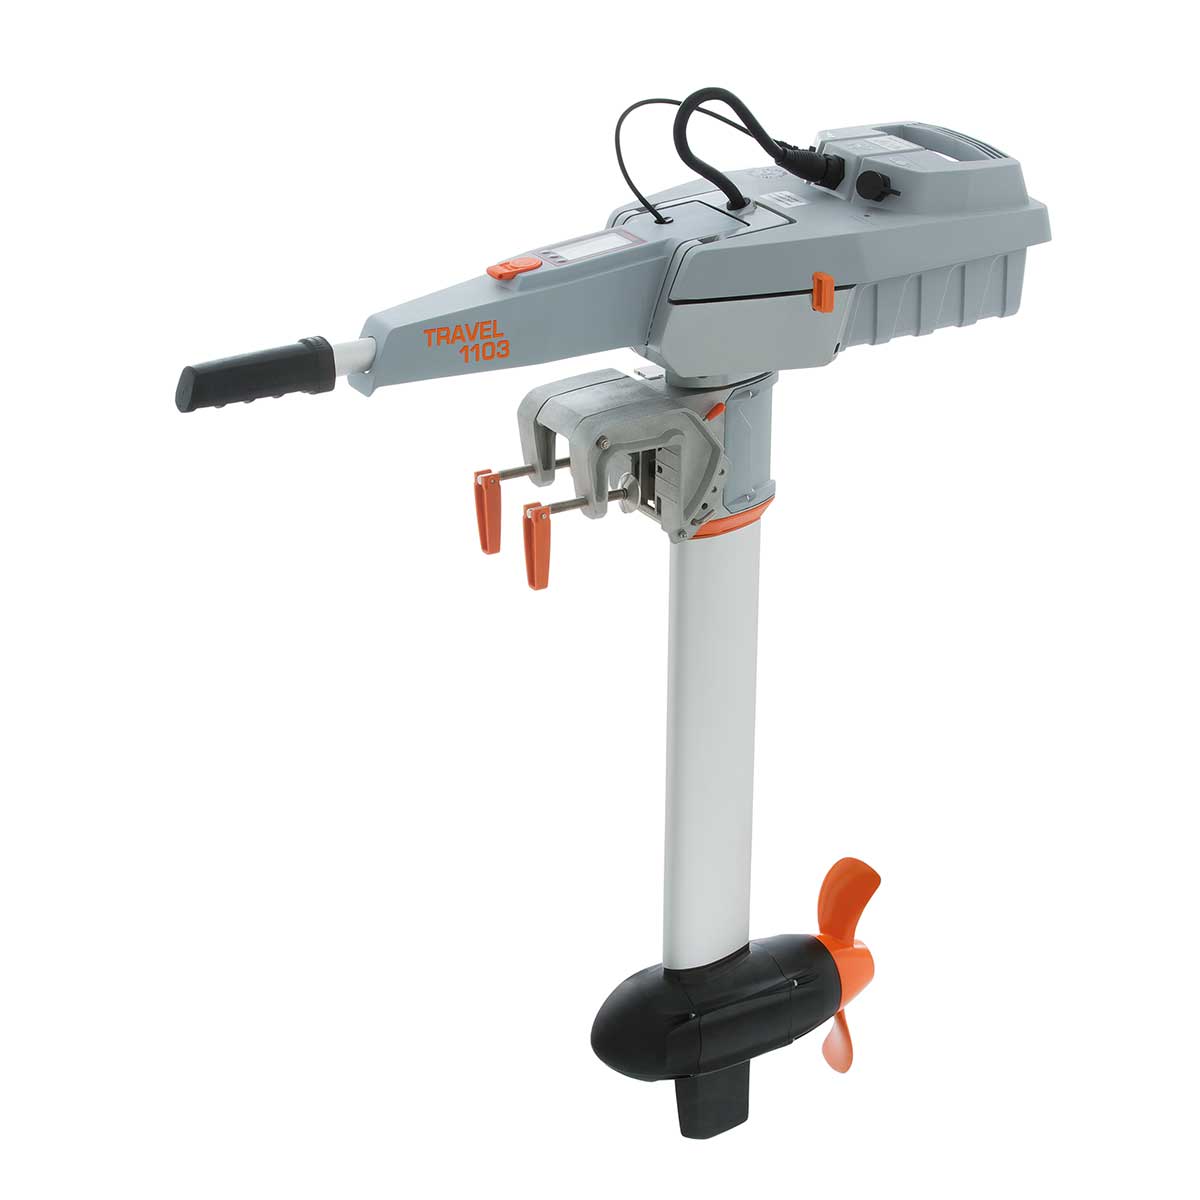
The Torqeedo travel outboard I purchased (the Travel 1103 CS) is great. I like the fact that I can charge the battery 915Wh battery with my house solar system and the range with the dinghy is more than adequate (well over 10nm at a decent speed). It is also very quiet, easy to mount, and generally just a cool little outboard.
If you are interested in learning more, you can find information about the Portland Pudgy at www.portlandpudgy.com.
And here is a link to Torqeedo's lineup of outboards and batteries: www.torqeedo.com
